With the front triangle done and the dropouts in the chainstays, it's time to attach the rear triangle. I usually jig up the whole back end at one time, then tack it all. Chainstays to BB first, then seatstays to seatlug and seatstays to dropouts. The chainstays are very straightforward, seatstays take a little more time to jig up correctly. For this frame the customer wanted them
 fastbacked to the seatlug. The slant six seatlug has a lot of area on the backside perfect for this type of attachment. Mitering fastback seatstay can be tricky though. They're very time-consuming to do by hand and tough to get to match perfectly. It's easy to miter one stay to the tube, the hard part is making the other stay match in perfect symmetry. Fortunately for me, with my mitering arrangement I can miter the seatstays for fastback attachment on my horizontal mill and make them pretty much perfect on the first try, it's a huge timesaver over filing.
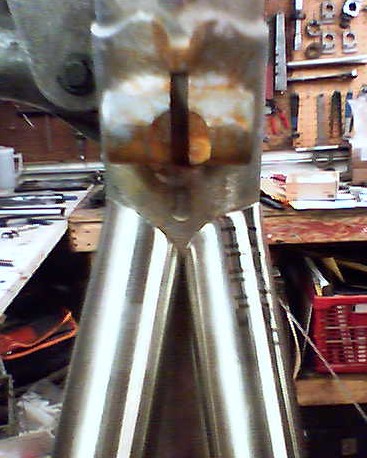
Here's how they looked mitered up. Sorry about the bad picture, it was taken with my phone, couldn't find the camera that day.
 Once the seat-tube end is mitered up just right I make sure the dropout end is cut right and it's ready to tack. I tack everything in the jig to make sure the dropouts are in the right spot, then take it out, put it on the alignment table to measure it and once I'm sure it's dead on, braze everything up in a workstand.
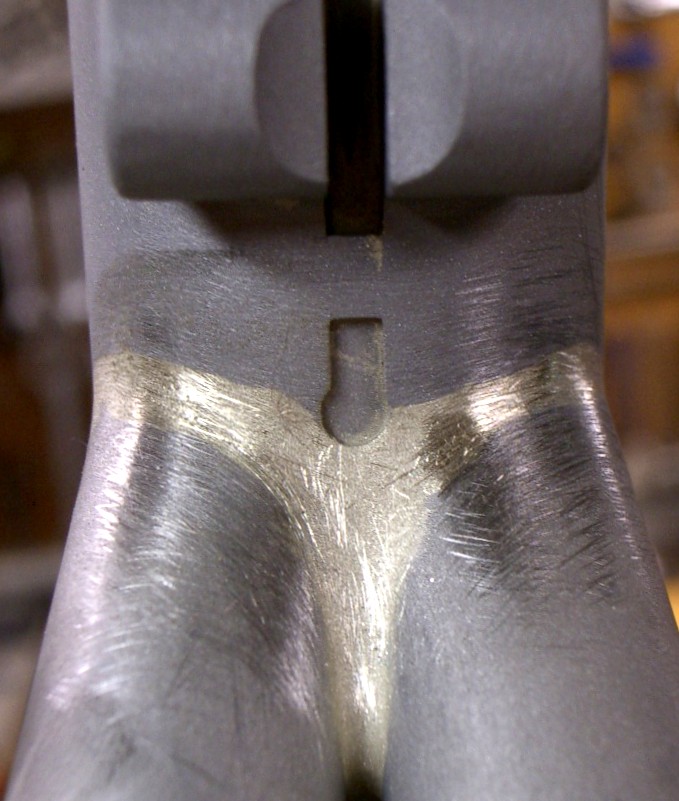
Here's how it looks after removing the flux and hitting it with some 80 grit. There's virtually no way to file or sand between the stays, so you have to make sure you lay that silver in there perfectly with the torch. I kept the fillet as small as possible as I didn't want a large amount of silver showing around the seatlug (remember, no paint).
 This is without a doubt the hardest brazing to pull off on the frame. The lug is brazed to the tubes with silver so you need to be very careful not to melt out that filler while brazing the seatstays onto the lug.
As you can see, I keep a uniform sized fillet all the way around the stays. That's not easy to do, but again, since there's no paint to hide anything I want it
 to look good. I want every detail of this frame to be as clean as possible and really show off the built.
And finally, here is how it looks after finishing up the seat-post clamping slot and cleaning up the seatlug.
One challenge that came up on a frame this size with compact geometry and 19mm seatstays is the length of the brake bridge. The rear end is very tight on this frame, 40.5cm chainstays and a sloping top-tube means the seatstays are quite short. When combined with the fastback attachment that makes a very tight area for the brake bridge.
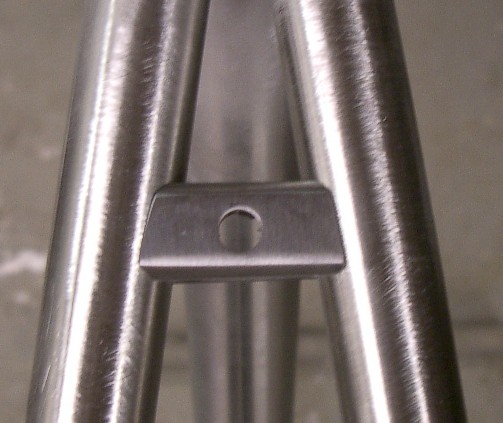 The bridge that Reynolds sells with the tubing is great, perfectly machined, looks like it might be a Paragon Machine works bridge, but made from stainless. Unfortunately in this case I would have had to cut it down so much that it would be very difficult to braze it in without making a large fillet. I didn't want a lot of silver around the bridge because I felt it would detract from the look, so I made my own bridge that fit the bill better. I had to machine it from 1" round stainless stock, then mill off the faces to attaching the brake. Then I milled out the underside to keep it light. The nice part is I was able to machine it on my vertical mill to fit the stays perfectly, so when it's time to braze I was able to just sweat in silver and braze it in pace with virtually no exposed fillet. Very clean looking.
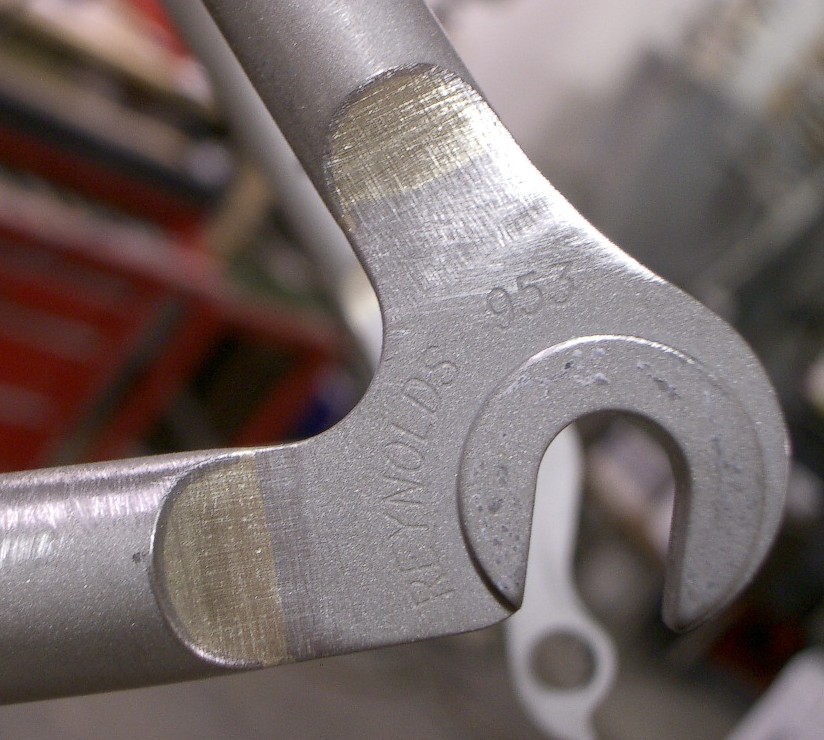 Here's the finished dropout treatment as well. I have to admit Reynolds did a nice job of sizing the dropout tabs to fit the tubes, I hardly had to file them at all to get to the finished shape shown here. The tabs match the OD of each tube exactly. I chose to file the tabs down to fit them inside the tube ends rather than my usual technique of slotting the tubing. This made for less exposed silver in each joint and a cleaner look.
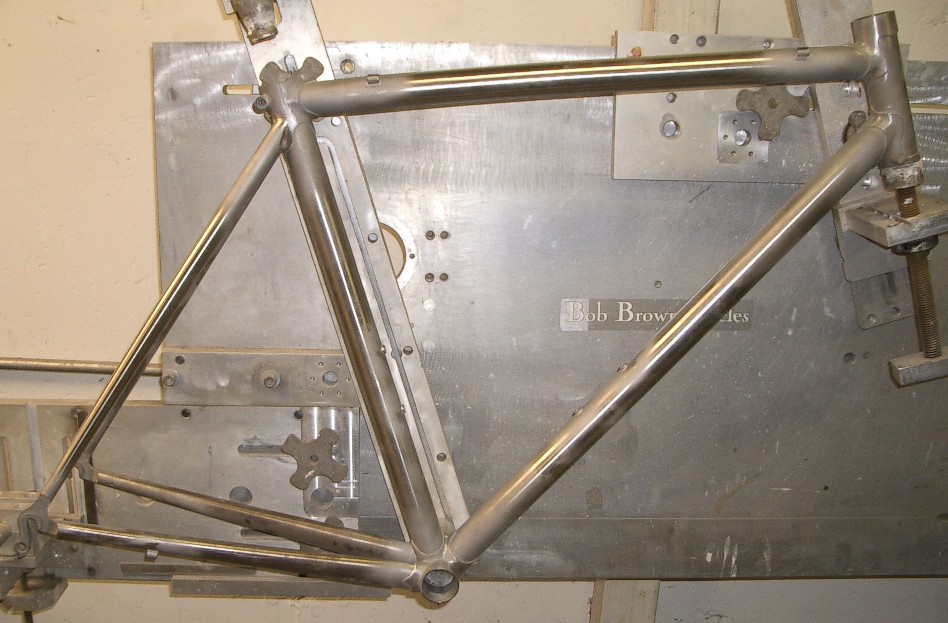
Finally here's the fully built frame. I won't say it's finished because I still need to put the final finish on the stainless, but all brazing and filing are done. I'll have some pictures of the frame with the final finish in the next episode.
In other news....
I took yesterday afternoon off work, it was what will probably be the last really nice day of the fall. About 65 degrees and sunny with a forecast of 30 and windy the rest of the week. It was a moral imperative to go for a bike ride. So I broke out the fancy road bike and headed to Afton. Spectacular day for riding, wearing shorts and short sleeves felt great. I wish my legs felt as good, but they made it though and I felt really good at the end. Today it's 35 degrees out and windy as hell, glad I rode yesterday.
 I also spent some time this weekend and yesterday working on the latest house project:
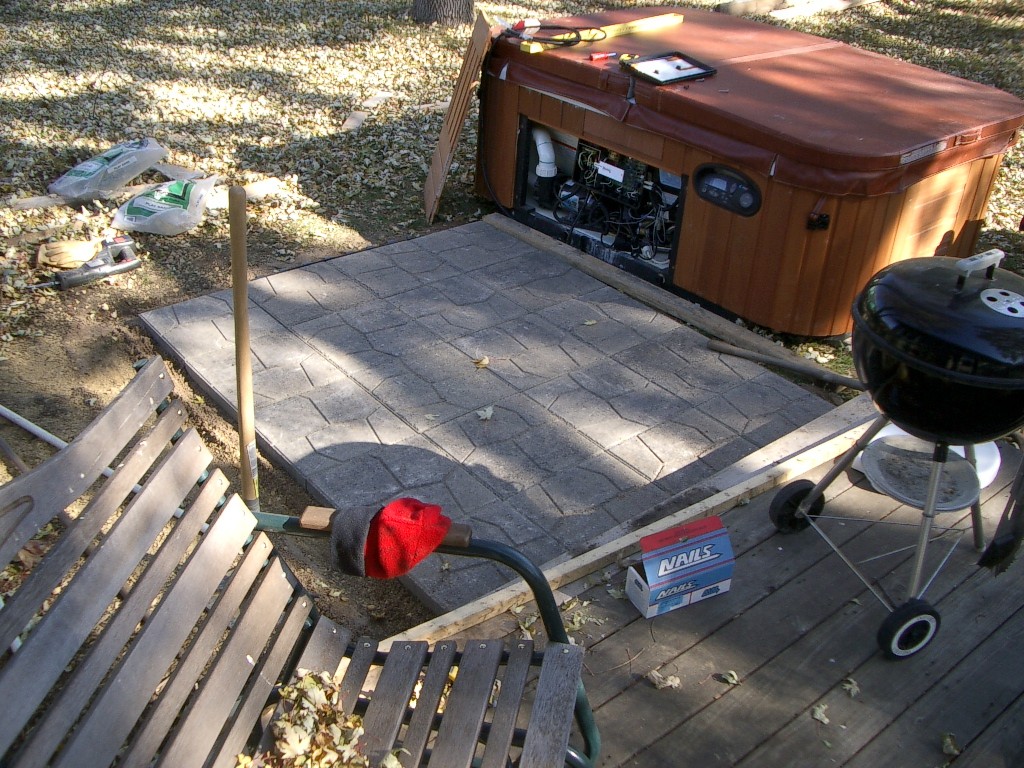
Yup, got a hot-tub. Never really thought I would, but the price was right, free. A huge thanks to my Sister-in-law's Dad who gave it to us. I had to put down a suitable pad to mount it on and I'll have to expand the deck slightly to give us a walkway. The pad went quickly but wiring it up has proven to be a challenge.
The thing has the craziest wiring I've seen. It comes stock set-up for 120v service, 20 amps. That's simple to hook-up, but it also limits the heater output and it can only run the pump or the heater, not both at the same time. So in an outdoor application the water would cool off pretty quick (especially in MN in the winter). So I followed the manufactures wiring diagram to convert it to 230v service. Well, they require a new bub-panel be installed in the vicinity of the tub, and that you have 2 GFCI breakers in that sub-panel, one of which is 120v, one is 240v. Very odd. To make it worse apparently every other hot-tub on earth just uses a single 50amp GFCI breaker in this sub-panel because they sell kits to accommodate that all over the place for pretty cheap. But the internal wiring in this baby is set up as two discrete circuits, a 20amp 120v and a 30amp 240v. None of the internal wiring is large enough to handle 50amps, so You're really stuck using this goofy set-up.
Of course no home-improvement type place actually stocks the required breakers to make this happen (you need a 30amp, 3 pole GFCI breaker!). So after calling every specialty electrical supply place in town I finally found 2. One was $168, the other $120. I opted for the $120 since they were identical part #'s. So hopefully tonight I'll be able to finish this up and start heating some water.
So between the $160 worth of wire needed to run the sub panel, the breakers, box, concrete pads,filters, etc... This "free" project is up to about $500. Oh well, it's still a great deal since the tub would have cost 10x that alone and most importantly it will make Beth really happy (and me too!).
bbbb
1 comment:
You sly dawg you!
A hot tub eh?? Makes me think Will Ferrell as the Professor in those SNL skits practicing the ancient art of Shin-Shi Shin-Shi.
[gag]
;-)
-Me
Post a Comment