Just in time for Christmas, I've decided I have too many projects and bikes hanging around the shop. Not to mention that developing this 29'er project and a custom fork crown have most of my monetary resources tied up right now, so a little extra cash couldn't hurt. Therefore I offer you the exceptionally unique opportunity to purchase a used Bob Brown Cycles bike or frame.
I've got 2 of them to offer right now, one for the
roadies, one for the off-roadies.
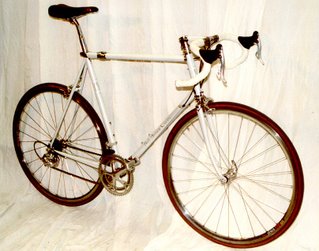
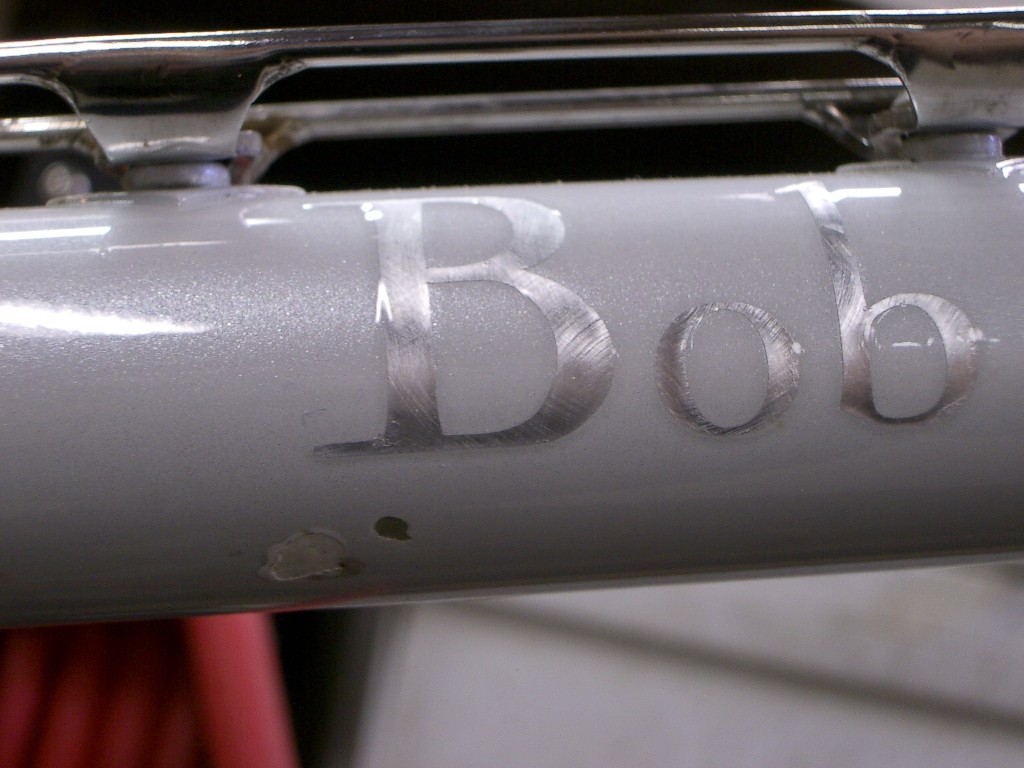
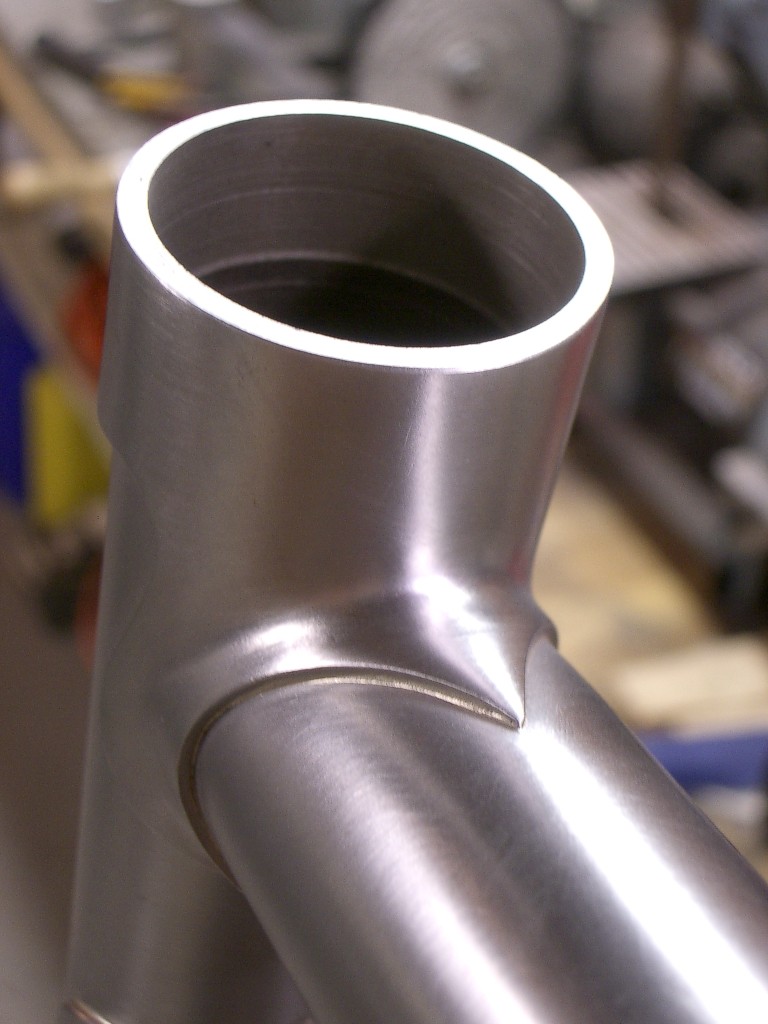
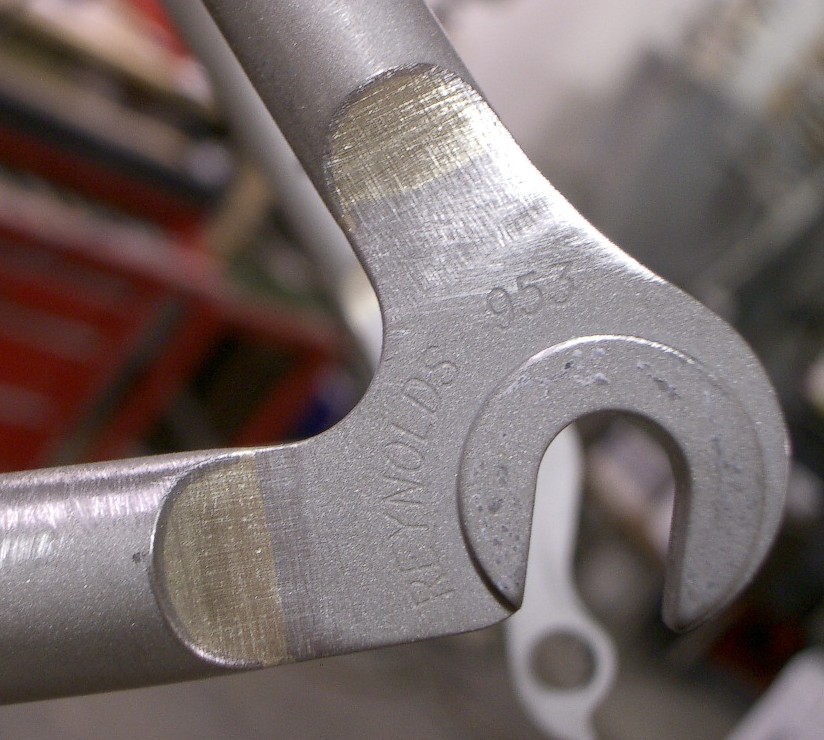
First is BBC serial # 0304. it's a 60cm seat-tube x 57.5cm top-tube road frame. 73 degree parallel angles, 75mm drop, 41.5cm chainstays. The top-tube has a 2 degree upslope to get the bars up slightly higher than a level top-tube. Polished stainless lugs, Matching polished stainless lugged stem, polished S & S couplers and polished fork crown and all lettering on the frame is actual Sterling Silver leaf!
The tubing is Dedachiai Zero Uno (.8/.5/.8 wall). Lugs are Long-shen long points, hand filed to shape and hand polished. Rear dropouts are Henry James stainless with polished faces.
The paint is a custom mix, it's white with a metallic silver pearl over it. It's quite stunning in the sunlight.
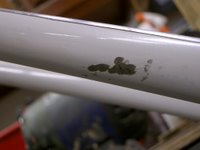
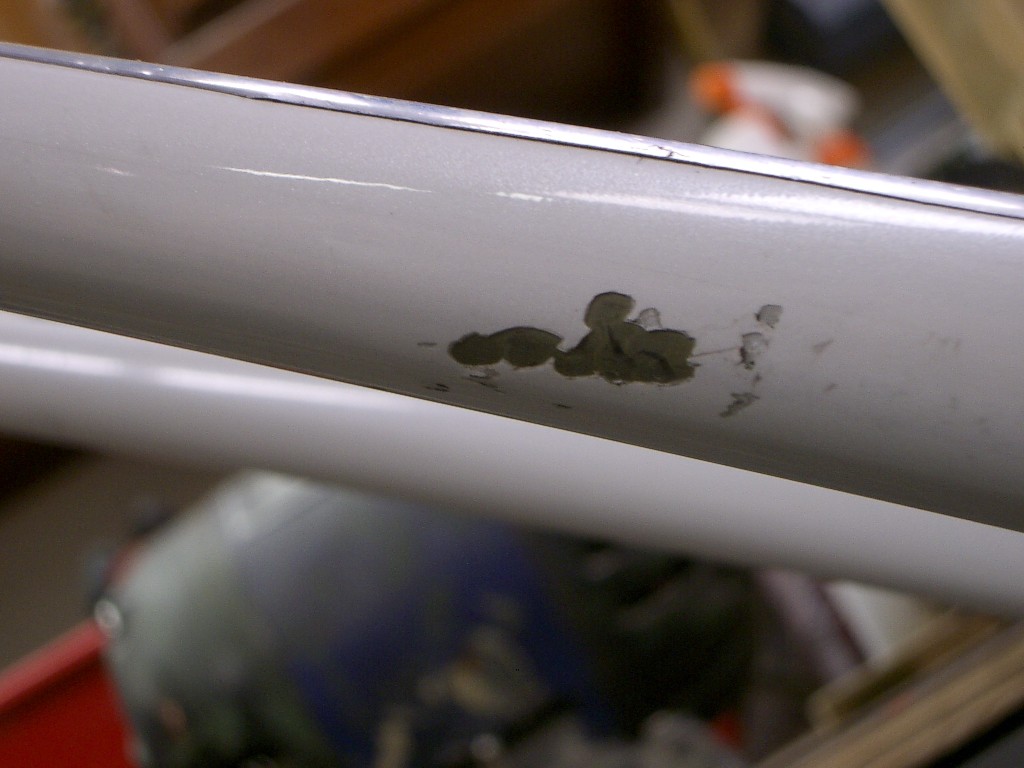
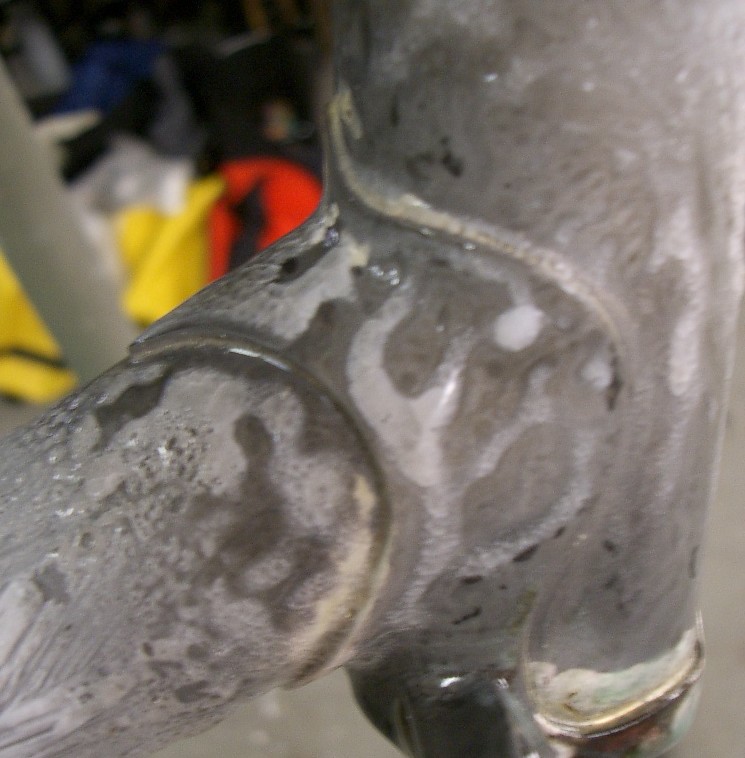
The bike is overall in good shape, but the paint is starting to show signs of several years of traveling with me around the country. There are a few paint nicks and chips, I've taken close-up pics of the main offenders. Shown below, there's a good chip on the underside of the downtube that's been roughly covered with white paint (note the nice silver lettering). The top side of both seat-stays has a small chip above the dropouts from a packing incident. I simply wrapped this spot with white tape and it's pretty unnoticable, for the picture I obviously removed the tape. And the driveside chainstay has a couple bigger nicks shown below, towards the underside of the stay.


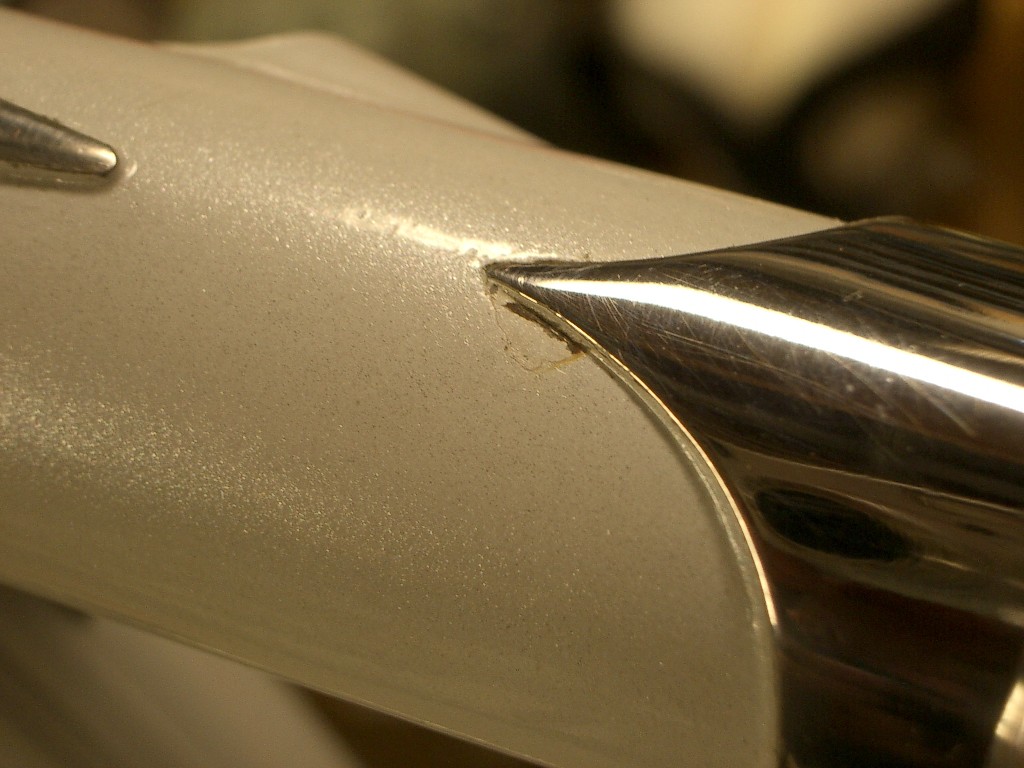
There's also a very small nick shown above at the edge of the top-tube coupler. This one is pretty minor, but it's on top of the top-tube, so I wanted anyone interested to know about it.
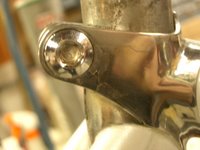
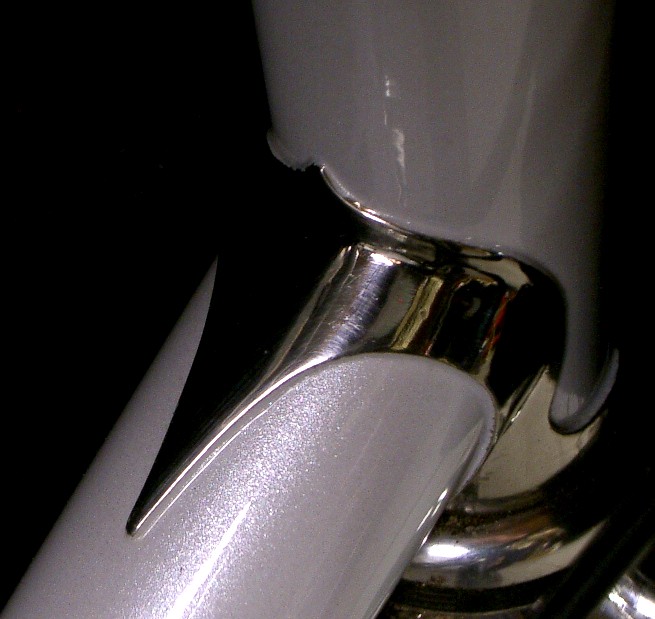
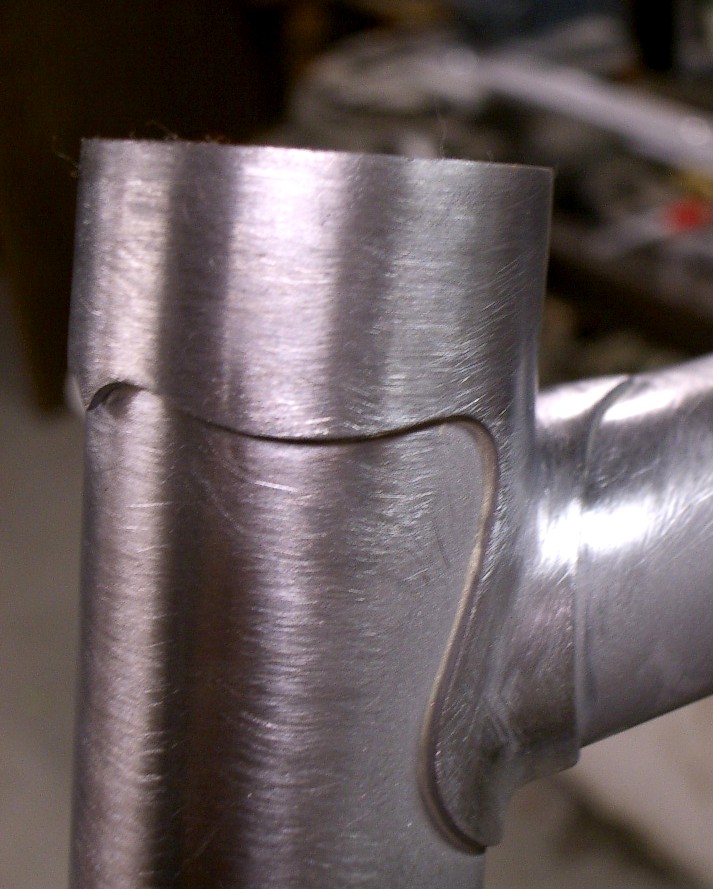
In addition, this was the first frame I clearcoated over the polished stainless lugs, which really brings out the shine in the stainless, however it had a downside on the seatlug and rear stem lug. The clearcoat doesn't adhere to the polished surface very well and I've had some chipping of the clear around the seatpost binder and the stem binder bolts. It's not noticeable from more than a foot away, but if you get in close to look, it's there.
I'm really focusing on the little flaws here because I want anyone who might buy this to know exactly what they're getting, but honestly this bike is still in pretty good shape, but it's not in show-room condition. I've been planning on refinishing it for about a year now and I'm realizing I just won't have time to do that for quite a while. It's still a great riding bike though, so I figured why not offer it up to someone in it's current state. I also couldn't bring myself to strip it down and do a full repaint quite yet because it's not _that_ bad and I hate to lose to beautiful Sterling Silver logos in the process.
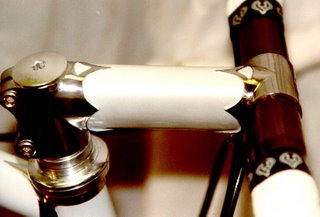
Let's talk about how neat this bike still is. Even in it's current state, I get compliments on it wherever it goes. The lugged stem is a great finishing touch, and with the full silver Campy Record kit that is on it, it will turn heads.
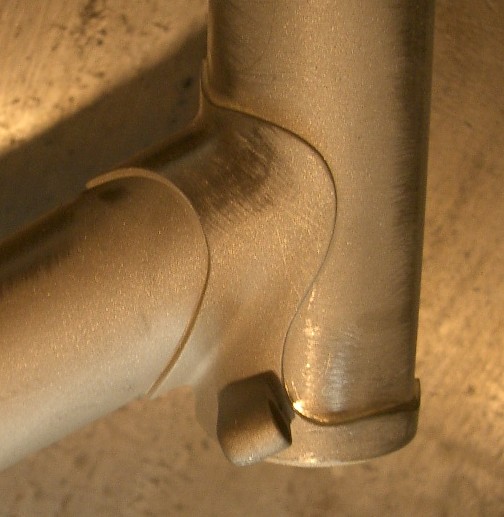
The picture below shows the downtube lug and it really captures the look of the paint in the sunlight. Lots of silver sparkle, but overall still looks white.

The bike currently has a full Campy Record kit (9 speed) on it from 1999. It's the last generation campy with all polished aluminum parts and no carbon, which is why it's on here. Everything on the bike is polished basically. The wheels are 28 hole Record hubs with Sun Venus deep v rims (polished of course!). Bar is TTT Prima, Avocet saddle, Campy record post. Complete this bike weighs in at about 19.5 lbs, which isn't bad for an all steel S & S bike. It rides great. Anyone local to me is welcome to come over and check it out or take it for a spin. All components are in excellent condition both mechanically and cosmetically as are the S & S couplers.
I'm flexible on how it's sold, it could be a frame and fork, could be a whole bike if you want, or I can sell you whatever portion of the parts you want. If I were to recreate this frame and fork today it would have a price tag of about $2500, the stem would be $300, and the build kit would be another $2000. I'm thinking I'd like to get $1000 for the frame, fork,and stem or $2200 for the whole bike (minus seatpost, and pedals). I can make you an excellent deal on any S & S accessories you want to go with it as well.
Bike #2:
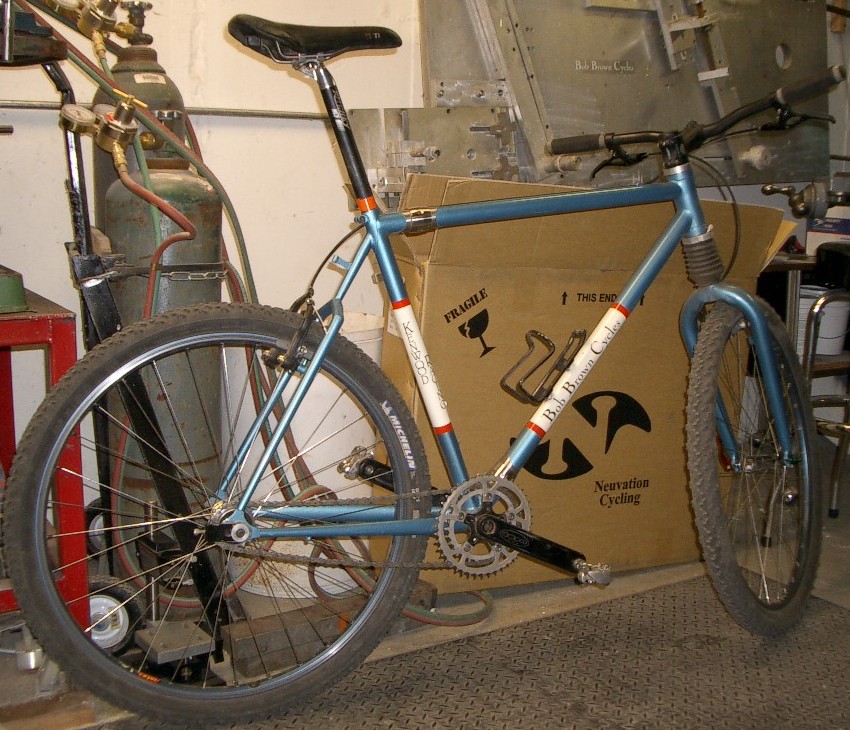
BBC serial # 1013 Headshok singlespeed S & S mountain bike!

Sorry for the crummy pics, I didn't take the time to setup a proper backdrop.
This one has a 19.5" seat-tube, 23.5" top-tube, 50mm BB drop, 72 degree head angle (with sag), 73 degree seat angle. The frame is very light, it's Columbus Foco mtb tubing, 35mm downtube, 31.8mm top tube, 28.6 mm seattube. Track dropouts with stainless steel faces (to prevent paint damage), wishbone style seatstays. Two panel BBC/Kenwood racing limited edition paintjob. Entire frame is fillet brazed. The fork is a cannondale Fatty SL, 70mm travel, damping dial with 5 position damping adjustment (including lockout). The fork was recently rebuilt with new seals so it should be good to go for a while. Air sprung, oil damped, very nice smooth action.
I also have a 50mm travel fork that matches this bike, if you prefer shorter travel and less weight, this is the option for you. This fork has modified steel legs and reduced height similar to the one
shown here(scroll to the bottom of the page).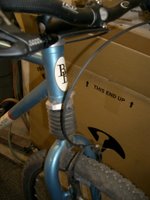


Here are a couple of closer shots. The paint is in great shape on this one, overall condition of the bike is excellent. This was designed and built as a very lightweight cross country racer. Therefore it's not the stiffest frame on earth, but it's very light and climbs great. If you want a bike for huckin' big gaps, this isn't it. It's a full-on race machine. Infact I rode this bike to a 3rd place solo finish at the 24 hours of Afton (as a singlespeed), and 2nd place team finish at 2 hours of 9 mile.
The parts are also quite light. Currently it's built up as follows:
Wheels: Rear- Ringle singlespeed freewheel hub, 28 hole laced to Velocity Razor rims (dark blue anno) with 15g spokes. Front- Real hub, laced to Velocity Razor rim (dark blue anno) 15g spokes. Tires Michelin Comp-S lites.
Cranks: Specialized cold-forged, the super-nice old style 110bcd cranks, very low Q, polished finish (note these cranks aren't shown in the above picture), Shimano UN72 BB
Stem: Cannondale Headshock, Bar: IRD Carbon Riser.
Brakes and levers: Cane Creek Direct Curve
Seatpost: Ritchey WCS, Saddle Bontrager Ti (I might want to keep those)
Headset: custom machined to fit headshok! Sealed bearings, aluminum cups.
All together the complete bike weighs in about 18.5lbs with the 70mm fork and S & S couplers! It's a little lighter with the short travel fork.
You might notice in the top picture I have 2 chainrings on it. I often did that for traveling as I could have a big gear for riding on the roads and a low gear for off-road. Sometimes I wouldn't know how much off-road riding would be available where I was traveling, so it was good to have a big gear to cruise the roads.
This is an absolute one of a kind bike. It is a used bike, so I won't offer any kind of warranty on it, but the frame is quite sound and will provide years of service if not abused. This is really the bike for a lighter weight finess rider who want's to go light and fast.
Again, anyone local to me is welcome to take it for a spin. Brand new this frame and fork would cost about $2500, parts are probably another $800. I'd take $1000 for the whole shebang (minus seat and post), which is a stellar deal. Or make me an offer. or if you want any other parts let me know, I can probably get them for you. Frame and fork and headset alone :$600
This one has just been hanging aroung the shop, there's nothing wrong with it at all, but at this point a complete and utter 29'er addict and I can't see that I'll use this one much anymore. If you want any S & S accessories I can make you a great deal on those as well.
email me with any questions
bbbb
 I'm pretty sure those will be the four most commonly heard words directed at the new owner of this beauty.
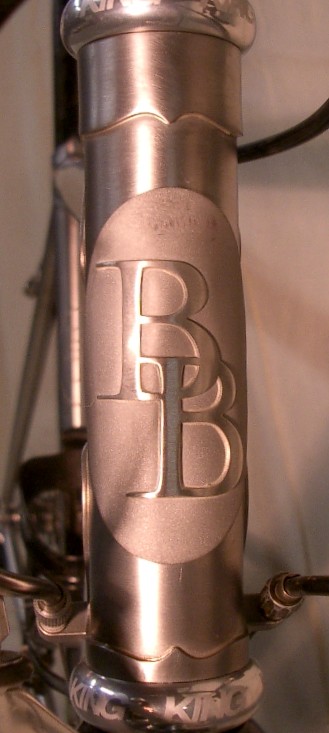 and most importantly: a matching stainless steel headbadge!
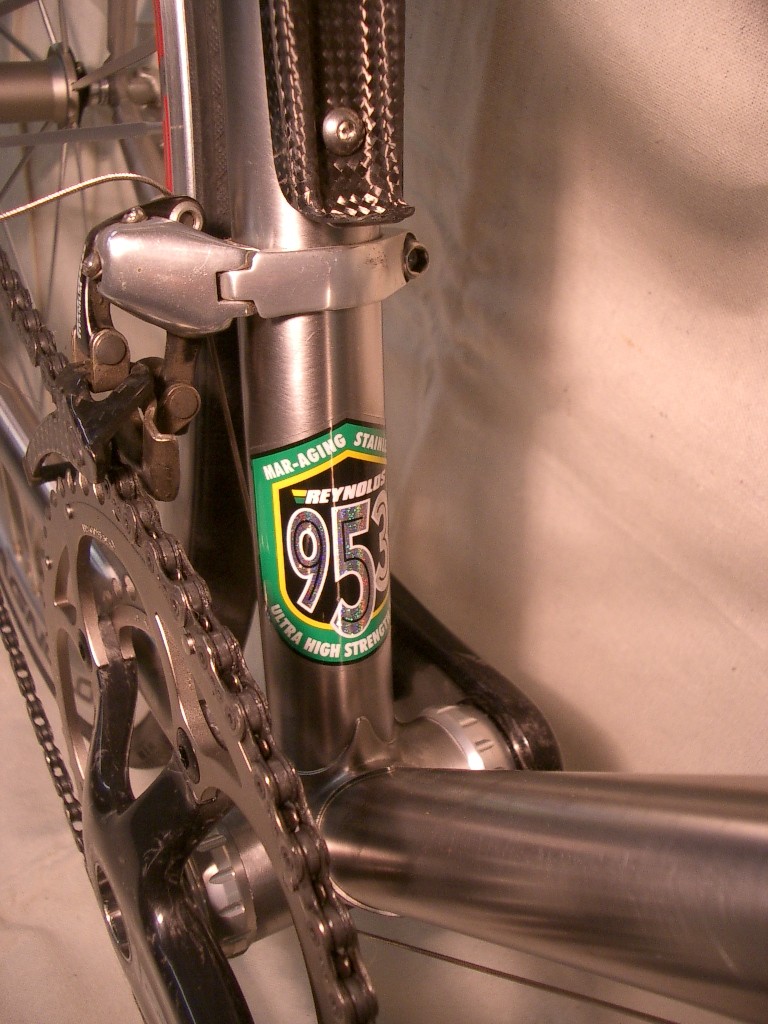
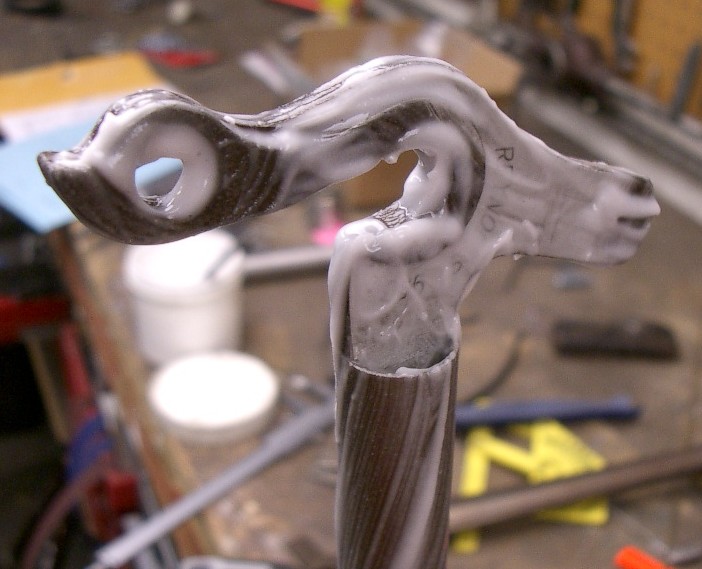
 suspicions about how this would look, but in the end I'm quite pleased with it. All the lettering came out very crisp and clean. I enlarged my downtube logo a bit from my usual size. This helped fill the big 35mm downtube, but the larger font size makes the letting look more crisp as well. It shoudl hold up quite a bit better than any decal would as well. It's very difficult to scratch, I tried on a few test samples and the only way I could ruin it was to go over it with some kind of abrasive.
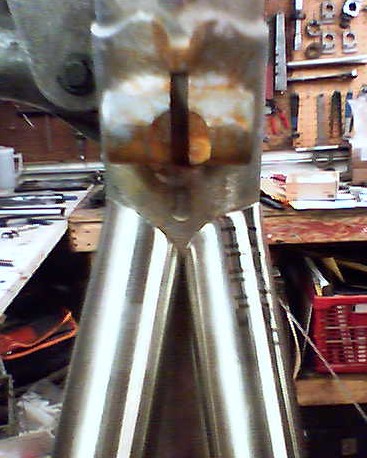
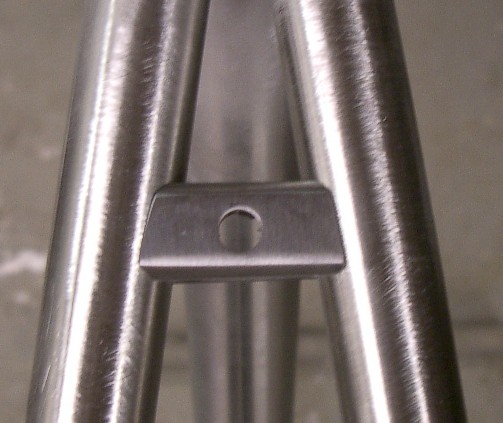
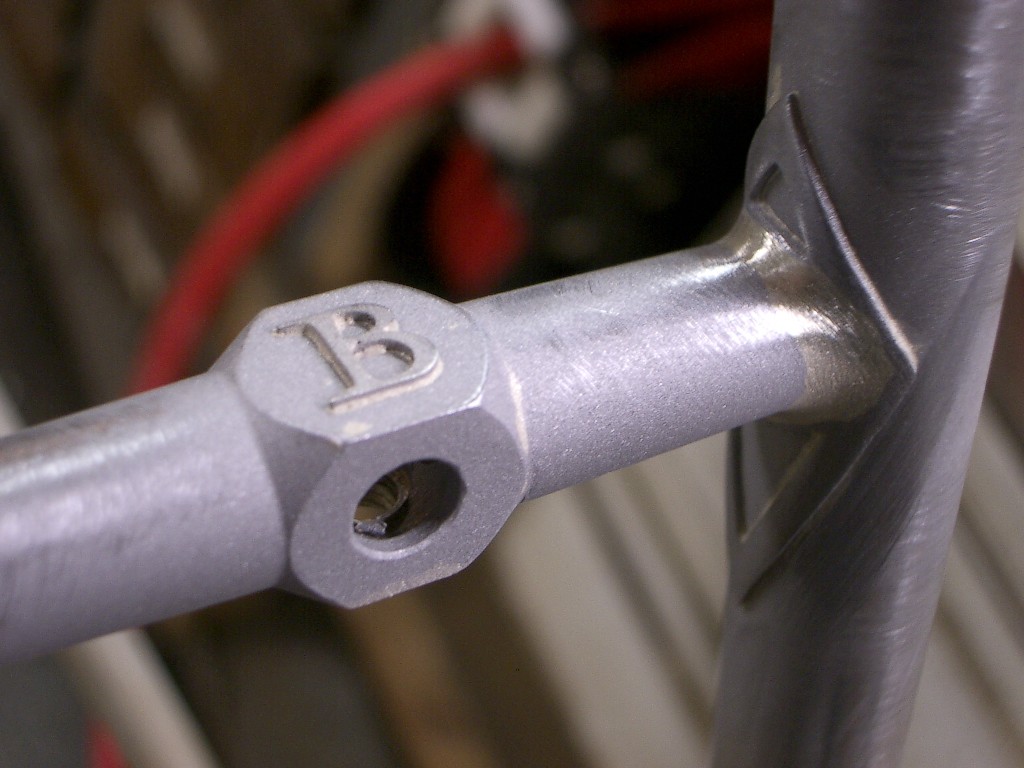 Finished up another frame this week as well, a nice sport tourer. I added a couple of fun details to this one too. Here you see the top of the brake bridge with one of my "B" 's added on top. Then I brazed the headbadge on this one and will be masking the paint around it. Thought I'd try something different, I think it'll look pretty sweet after paint.


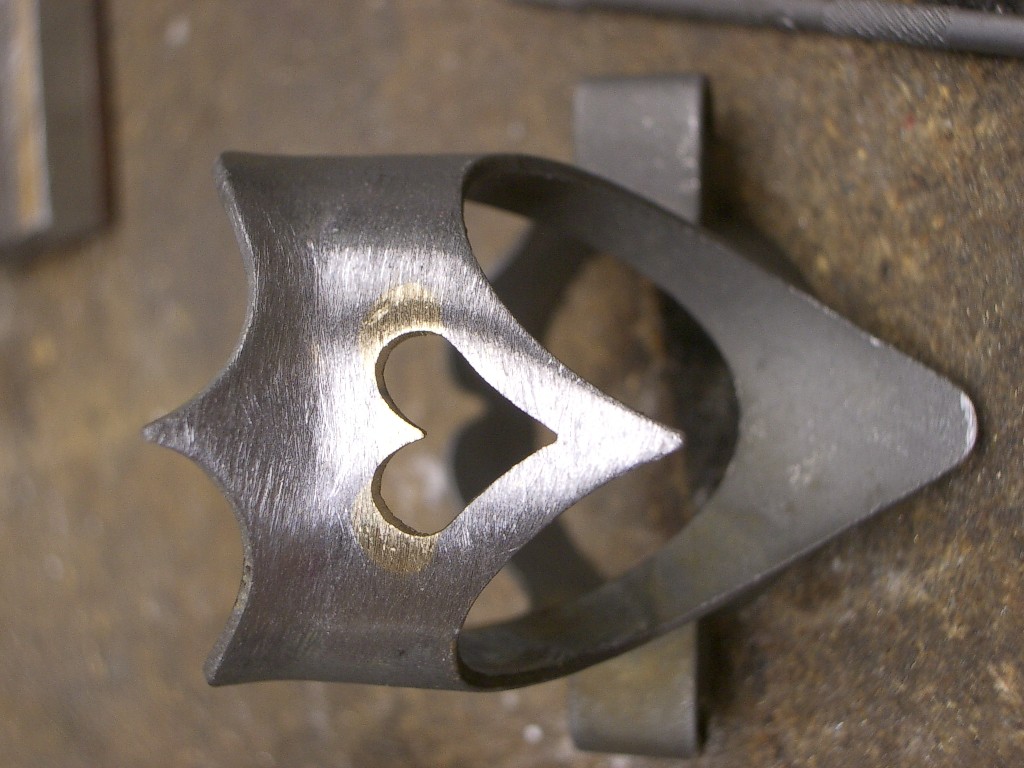
 into headbadges. To the left is what the raw letting looks like. These can be brazed right onto the head-tube, or brazed to a stainless backing to make a more traditional looking badge.


flux.jpg)
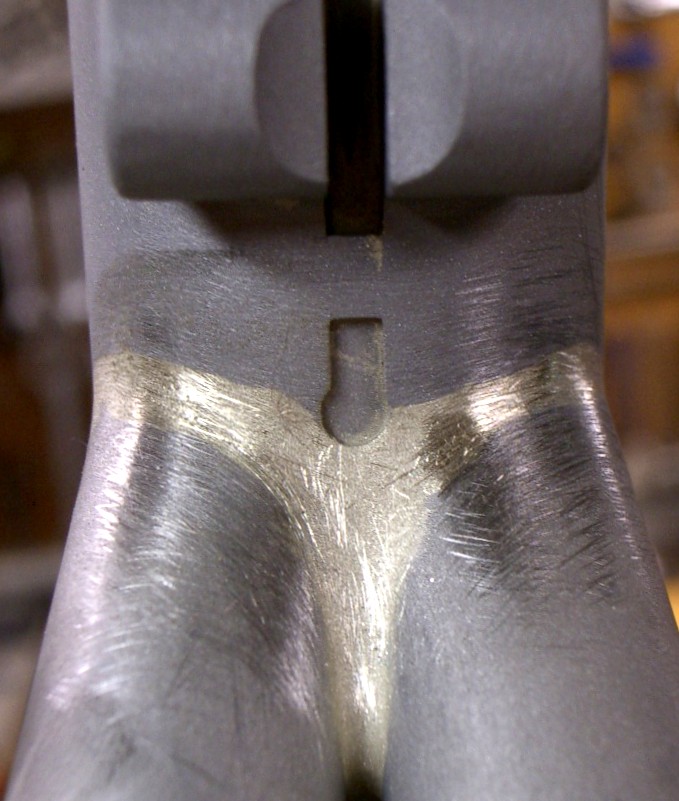
 Here's how it looks after brazing and soaking off the flux. Notice the natural fillet of the material, that's what you want since I'll be scalloping this area out in the next step.