It actually ran fine when I got it, but I wanted to be able to do some automating with it in the future (I have big ambitions), so I wanted to be able to run it with pushbutton controls and a proper motor starter. As noted in my last entry, the aux. contact wasn't working properly, which meant the motor wouldn't stay running after you release the start button. So I took apart the aux contact to find that it was missing the actual contacts!
This starter was old stock, so a replacement aux contact was difficult to find. I did locate a couple, but they were more expensive than just buying a new starter! So I machined my own from some contacts from another contactor. I never imagined I'd be making internals to electrical controls in my shop, but it was actually pretty easy. After that was made, I installed it only to find out it still didn't work right. Took me a while to figure out what was happening, but eventually I realized the main contactor wasn't pulling my new aux contactor in far enough to make the switch trip. With a few more adjustments, it worked! I know this probably isn't very exciting for you folks, but to me, making something electrical that actually works is a big accomplishment (there's a reason I'm a Mechanical Engineer, not Electrical).
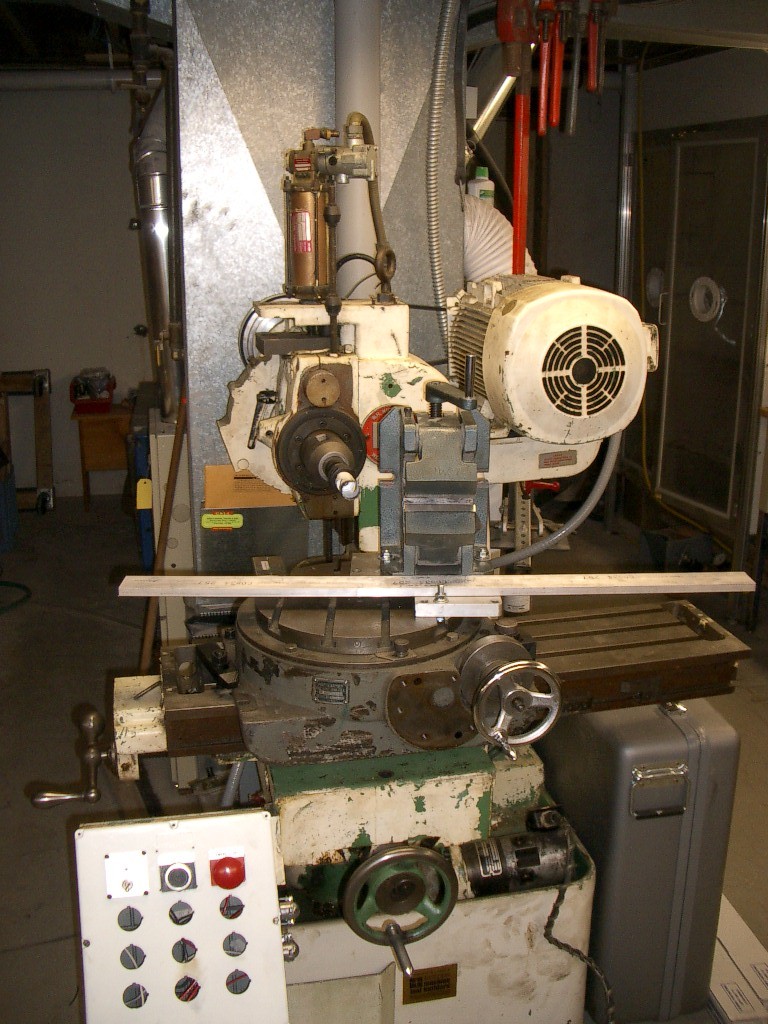 Then I got my rotary table and tube vise mounted up on the main table and aligned everything up. Here's how it looks. It's actually a pretty simple device, basically a cutting spindle with a rotary table and an axial feed, but this one has 2000lbs of steel to back it up! Mass your best friend when it comes to working metal, and the more rigid this set-up can be, the better the cut will end up.
With this arrangement, I think the set-up is about as rigid as it could possibly be. The only improvement I can think of would be to someday replace the vise with a very large 2J collet closer with collets to fit the tubing. But that would be a pile of work and I'd have to change collets with each different tube diameter I use. This way the vise fits all diameters.
The beauty of this arrangement is that once everything is aligned, I will be able to make very accurate miter lengths very quickly. You see the center of the rotary table is lined up with the centerline of the spindle. So I can set any angle I want on the rotary table and maintain the same centerline of my cut.

The master plan then is to have a movable stop located on the far right end of the aluminum bar you see in the picture. This stop have a scale on it to set the tube length to exactly where I want it, then I just put the tube in the vise and cut it. It's hard to describe, but it should work very well and save me a bunch of time. There is a slight length correction needed for different tube diameters (due to the centerline of the tube moving slightly in the vise) but I can account for that in my spreadsheet which I use to calculate the tube lenths.
The next step is to mount my DC motor on the mill for the axial power feed. Once that is up, I can add the limit switches and automate the whole cutting motion, all I will have to do it put the tube in the machine, set my angle and start the cutting cycle.
Incidentally, for other tool geeks, that's a 12" Pratt & Whitney rotary table on there. I picked that up from the same dealer as the mill, he just wanted to get rid of stuff! The spindle is a 40 taper, which I put a 1.5" diameter collet chuck into, which is what hold my cutters. I can change the cutter by simply loosening a nut up front. It works really well.
 Aside from playing with machines, I did get some other work done the last few days, including a big chunck of the remaining work on the house. Monday Beth and I spent pretty much the whole day shellacing birch plywood to make out wood-wall treatment for the living room. Took 3 coats on each sheet and a bunch of sanding, but in the end, it came out great This is the north wall of the living room, the one wall without windows. The birch has a lot of pillowing effect to it, much like maple. We're pretty happy with it, now I just need to trim the edges and the top.
I also finished up the bathroom, all fixtures are in, I think I'm ready for the final plumbing inspection! We should be really close to the final electrical inspection as well. Once those are done and I finish a couple small touches I think I might be ready for the final building inspection too! Now that's exciting.
We ordered the carpet for the main room too this weekend, the installer is coming over today to measure things up. I'm not sure when he'll actually install it yet, but maybe I'll know that this afternoon. I think that just depends on if the carpet manufacturer has that exact color in stock or if it has to be ordered. Once that carpet goes down, this thing's gonna look like an honest-to-goodness room!
bbbb
1 comment:
Long time rider and amature mechanic. Last year with the kids in College we bought a old house here in Boulder, CO. Complete renovation where I did all the work except for the major electrical upgrades. Best thing is the full sized basement (unfinished). Now have a real mechanic shop where I can leave the tools out. Appreciate the look of your Birch wall and know how much work a renovation can be. But, oh so satisfying!!!
Post a Comment