Friday, December 08, 2006

long time, no write.

I haven't had the time or the inclination (at least not at the same time) to write here lately. I was out of town for 5 days at Thanksgiving, then got sick at the end of that trip. Spent most of the next week in bed, then had to leave town again. Fun stuff.

But that's not to say that a lot hasn't happened. Sure being sick and out of town slows me down, but I've still managed to get a few things done.

First off I had the good fortune to finally get to meet up with Doug Fattic over Thanksgiving. He lives about 25 miles away from my in-law's in MI, so while we were over there, I made a trip over to his shop. For those who don't know, Doug is another framebuilder, located in Niles MI. His work all looked great, and he's known more for his painting skills. We spent quite a bit of time talking paint since there are so few that actually do paint. He's got a pretty killer set-up for a shop, he owns 7 acres of land right in town with a lovely old farmhouse on it. Then there's a 1100 sq. ft. concrete out-building a couple hundred feet away in which is his shop. So his commuite is a short walk out in the yard.
He's got a tremendous amount of equipement sqeezed into that building too. I always thought I was kind of an equipment whore, but he's got me beat by a good amount! Toys everywhere, and he knows how to use them. I guess that's part of teaching framebuilding classes, you need to have stuff for multiple people to use at the same time.

It was a great visit, I really enjoyed talking to Doug and hearing some of his stories from England in the 70's where he learned to build. He's a great guy and for anyone looking to take a framebuilding class, I would highly recommend his. He knows what he's doing and has a good teaching background.

Lets see, what else....

I finished up the first Route 29'er (that's the name of the production bikes) prototype and it's out for powdercoating right now. I'm pretty axious to see the results. It was a tough decision to go with powdercoat because in general I'm not a fan of powder over lugs. The powder finish is thicker and tends to obscure the detail on the lugs. However it's also very durable and considerable cheaper/faster than wet-paint which is pretty attactive for this application. I've got most of the graphics worked out for the decals, so I'll have those on order soon.

I promised the owner of the 953 frame I'd put some more pictures up here of the completed frame, so I'll have some next week. I'm etching in the logos on the frame instead of using decals. It looks really nice.

Headbadges! Yes, they came in early. Again, I'll have pictures soon, but they're nice, cut stainless with my overlapping "B" logo. Should be a nice touch on future frames.

Engraving. I am finally figuring out how to use my Pantograph machine and it's working pretty well. I engraved the serial Number and owner's name on the BB shell of my most recent build with good results. I'm still working on figuring out how the cleanly engrave wide block letters so I can recreate my logo on more items, but I'm getting close. I think once I get my micro end-mill adaptor made, that should solve my problems. Again, pictures soon. I made up a nice little jig to hold BB shells on the engraving table, now I need a small rotary table on there, so I can put my name on the raised dropout faces!
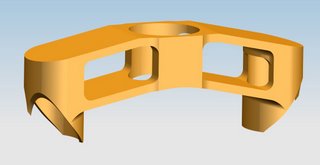
Crowns: I made more modifications to my crown design based off the prototype, thickened up a few areas, and increased the size of the fork blade ports slightly to fit more blades. I also shortened the overall height, which I feel makes it look better. I also changed the width, so the front and back of the crown are parallel with a small radius out at the steerer tube area.


Other stuff:

I'm hoping to crank out a couple more steel bed frames this weekend. People have been seeing the one I made for Beth and myself and liking it, so I'm making more. I'll probably add some pitcures to the website soon, under a class of "other stuff I build". There's a growing number of things that fall into that category, and I think I'd like people to know about them. I've got another entertainment center to build for our living room coming up and a few other small ideas I'd like to see come to fruition.

Are bike builders all audio nuts too? I've noticed this trend, I know Curt G is into nice audio stuff, while I was Doug Fattic's shop I noticed some ADS monitors in the shop, which are aweful nice for an industrial setting. It's one of my older passions. I started building speakers in college and still enjoy it (although I don't have much time for it now). My Jetta has a pretty swell combination of parts in it, but recently I had been really annoyed at mystery noises and speakers cutting out. So I finally took things apart one night last week and found a loose connection in one of the cross-overs for the front components and a loose voice-coil dust cover in one of the speakers. A few minutes with the soldering iron and some super-glue and things were instantly improved. I'm still amazed at the sound from the ADS 320 components I've got in there. They're 17 years old now and still have the clearest sounding vocal range of anything I've heard. Had to repair the flexible surrounds twice in that time, but otherwise they seem to hold up great, that's amazing for a set of speakers that have been in and out of 4 different vehicles now.

I've been having issues with our home stereo too. Actually not the stereo, but one amp in particular. I've got an older Audiosource amp in there running the masive 4th order bandpass sub I built into the bottom of the entertainment center. Well, somewhere inside that amp is a power relay that isn't funtioning right, so it only turns on occasionally. I hear it click in and out when it actually decides it wants to turn on, but I can't find the stupid thing. Once the amp is on, it works great, but it just doesn't come on very often. I need to tear into it a but further, but in the meantime I found another solution. I picked up a set of Def-tech 2002's off ebay which were in terrible cosmetic condition, but all the drivers and amps are perfect. Thankfully that made them sell for a song. So I'll be refurbing those and putting them in the living room. That solves 2 problems, the first if the mystery amp power thing, since these have built-in poweder subs, I won't need my external sub amp. Secondly, we both want a new entertainment center, but I've been hesistant to build it because the sub for our existing sound system is incorporated into the base of our existing entertainment center. I was going to have to cut up the existing one and remove the sub, than make a new, nice looking enclosure for it and place that in the room. With the sub built into the new speakers, that problem is solved too.
Anyone local want a fairly nice hand-made solid Aspen entertainment center with a really good sub suilt into it? you'll want a new amp : )

I promise pictures next week. Really.

bbbb

Monday, November 20, 2006

Showin' and tellin'

Today's edition will be complete with full color photos, something which is becoming a rare treat around this blog.

As I said earlier, my first prototype crown showed up. Here it is in all it's glory:

As I mentioned in previous posts, this one isn't perfect and I'm going to have to do some work with the supplier. The lower span that connects the steerer to the fork blade is below spec. thickness, and the steerer tube bore is under spec as well. In addition, now that I see it in person I have a few ideas on making it slightly more visually appealing without complicating it. I think I'm going to have the from and back face machined down parallel to each other, and put a radius out to the center section (where the steerer goes).


I heart Richard Sachs Lugs:

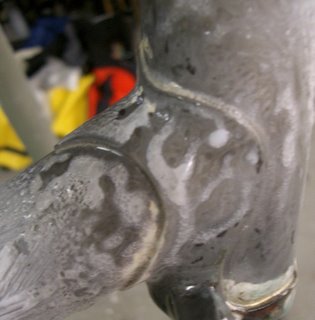
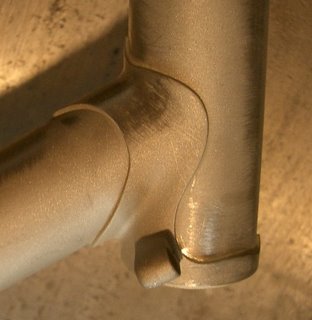
Quite literally in this case. The customer wanted Richard's lugs, but with the cut-outs changed to look more like hearts. Richard has a geometric shape cast in that's kind of a stylized heart. The customer wanted a more literal interpretation, so I added some brass to fill in parts of the window and re-filed things to what you see here.
I like how the shape of the cut-out follows the shape of the lug edge so nicely.

Richards lugs are really nicely done, simple and tasteful, but with enough room to be a bit creative. I like 'em. These should make for a nice sport-tourer with a little extra flare.

29'er talk:
Yup, here's the first prototype of these too. Can you tell I've been busy?
This one isn't exactly how the finished product will look as they'll have sliding rear dropouts, but it's a close appoximation. It's not quite done here, I still need to add the brake bosses, bottle bosses and cable stops, but you get the idea.
It's fully lugged, clean and tidy, just how I like my bikes. The sliding dropouts will be about the cleanest you've seen, I've been working hard to make them match the style of the bike.

I'm glad I went through the process of building this one up front, I came across a couple of snafu's that slowed me down and I was able to work on ways to solve them now, rather than on a finished frame. This one will just be for show to give the shop an idea of what to expect. They're double oversize tubes, 31.8 top and seat-tube, 35mm downtube. S-bend seatstays and chainstays for great tire clearance, disc and rim brake compatible, suspension corrected for an 80mm travel fork (they'll probably have the Reba or White Bros fork stock).

These are the dropouts I had originally spec'd as I thought the socket style would go nicely with the lugged frame and they'd save me time by not having to file scallops in the dropouts. Well, I used 'em here since I don't have the sliders in yet and I'm glad I'm not using them for the rest. First off, they have 14mm chainstay ports, which is perfect for the 4 year old Columbus mtb chainstays I have, but Columbus changed their stays to a 12.5mm tip now and my stock of old ones is almost gone. So that would be a big hassle. Secondly these really didn't save me much time over regular flat plate dropouts. By the time I smooth the braze around the seat-stay adjustable socket, I could have finished a set of regular dropouts. But on the plus side, they do look pretty good overall, and I like the cast-in disc tabs.

So I'm one step closer to these things being reality, but there are still a few kinks to work out.

and finally, here's a link to a nice video of the state CX race:

http://www.youtube.com/watch?v=Xaio8y-wU1s

About 3/4 of the way through is a nice pan of me rounding the corner into the creekbed dismount. Look for the gold skinsuit. Lots of good footage out there!

bbbb

Friday, November 17, 2006

recap -o- the week

I haven't had much time to write here this week, so I'll condense things down.

Last weekend was the state cx race, it was fantastic as usual. Lots of volunteer here, and tons of work put in by the Vitch. Thanks Vitch!
I headed out Friday afternoon to help put poles in the ground for all the snow fencing we were going to install on the course. I had no idea what we were in for. The "stakes" were steel sign posts (like the stuff that holds up stop-signs) and the city gave us one slide hammer to install them with. It was a pile of work, well mostly for the Vitch and Ezra as Ez kept telling me not to do the pounding because he thought my shoulder was still too injured. But eventually as they got tired, I took over and put my share into the ground. We got it all up before dark and it looked great. I had to high-tail it back to St. Paul though as I had a show to get ready for.

Packed up all my drums and other gear in the car, loaded up the other guys cars, and we headed out to the Guthrie. We got there a little early, so we parked out by the loading dock and waited. Didn't take more than 2 minutes and a security guard was out there to ask what we were doing. We explained and he let us go, but told us to be sure to move our cars as soon as we were unloaded. They're on top of things at the Guthrie, especially on opening night of a play.
We got unloaded and moved all our gear up to the Bar. It sure looked like a lot of stuff in a tiny space sitting in the bar, but once it was unpacked and set-up we seemed to fit in the space quite well.

We started playing early because it turned out the new show was shorter than expected and they wanted us playing when the show let out. So about 9:30 we started off gently. We kept the sound a bit low for the first hour as we didn't know how things would sound in the long, narrow space we were playing in. But as things went on, we got louder and more into our usual deal, and the people were still diggin' it. We ended up playing for almost 2 1/2 hours (with one good break) which is a hugely long time for us. All seemed to go great though, people thought the sound was good and we certainly had a blast. The bar did a good business, so everyone was happy. In the end, the Guthrie folks seemed thrilled by our turnout and performance and said they'd like to have us back again. We can't wait.

So after packing up all our stuff and getting home, I managed to get to bed about 2am. Slept till about 8:30 and that was all I had in me. I'm just not very good at sleeping in, I don't like trying to sleep when there's daylight. So I got up, feeling mighty tired, had my morning bowl of Lucky-Charms and figured I better head over to the 'cross race to help out. I got my stuff all set, headed out to the garage and promptly remembered I had a car full of drums out there that I had to empty before I could leave. Sigh.

Unloaded that, loaded up a bike and a bunch of warm clothes and headed out. Things were pretty under control at the race, so I helped out with a little last minute course marking and watched the C race start. I had made up my mind before I left that I wasn't going to race on account of how tired I felt. But that was before the Kenyan showed up. He shows up at the race and promptly spends the next half hour talking me into racing, so I go register and change my clothes just in time to get to the start line.
I figured I'd just hang out in back, ride the race, finish and feel like I accomplished something. That was my plan anyways, but I'm not very good at sticking to a plan like that. The gun went off (metaphorically speaking) and I was near the back, riding down the first straightaway. Already I was frustrated with people and feeling the need to move up, so I did. I started passing people, mostly on the runs, and I just never seemed to stop. By the third lap I actually felt pretty good, but the whole time I had the thought in the back of my head that all I had eaten all day was a bowl of lucky charms, and that wouldn't sustain much.

Side note: I had blown up the bearings in my usual Cane Creek CX rear wheel, so I needed a replacement singlespeed wheel and had brought my Stan's wheels with, complete with the Crow's mounted. I had been thinking I wanted to see how they worked for CX, and here was my chance! Believe it or not, that wheelset with those fat tires weighs virtually the same as my racing CX wheels with 27c tires.

Those tires turned out to be just the ticket for ths course. There were plenty of bumpy grass sections and washboard dirt roads, and these things just flew. This was the first cx race I had ever done on a singlespeed where I passed people on the gravel road section on every lap. It all just worked and I just kept hitting it with everything I had left.

I started really feeling the effects of my complete lack of preparations with 1.5 laps to go. The legs started feeling rubbery, but I figured this was the end of the season, so why not just push through it. The barriers and runup actually kept feeling better and better for me throughout the race, it was the flat grassy sections with the headwind that really took it out of me.
In the end I finished, 18th. Yup, that guy listed as #186 in the results is me, guess Billy didn't feel like putting in my name! I was in the back 20 or so people, so that means I passed about 40 something people in the race, no wonder I never felt like I was riding alone.

It was really good for a race I wasn't going to do.

This week I've been stocking up on shop-time. I'm working on several frames right now, and nearly have the first prototype 29'er frame done! That one has gone really quite well, despite a few set-backs. I wanted to see what glitches I might run into that will slow me down building these, and after this first one I think I'd identified most of them and I'm well on my way to having them solved. More details on that later.

I got my first sample of the new fork-crown. Came in Wednesday. It looks really cool and the fit and finish seem good, but there were 2 areas that were off substantially in dimension. There hole for the steerer tube was .015" undersize in one axis and one of the cross sections was too thin. Despite that, the look is good, and it definitely looks viable, I just need to get these Q/C issues resolved. I also have another possibility of getting them made locally, which would be awesome.

I've had a few folks bugging me to post some pictures of the completed 953 frame and I will. I've been waiting for my new headbadges to come in before I took final pictures of it, but I'll try to get some of the whole frame so you can see what it looks like complete.

That's about all for now.

bbbb

Thursday, November 09, 2006

more rambling

So apparently the Guthrie has a daily internet scanner that crawls the web looking for any new text with the word Guthrie in it. I know this because I met with the nice fellow from the Guthrie again yesterday to actually get the correct tour of the space and he was pretty embarrassed because appearantly many of his co-workers were filled in on my last blog entry. I think I've used the word Guthrie enough in this first paragraph that this entry should also show up on their daily scanner, so I just wanted to say, sorry James, but your tour was fantastic and someone over there should give you a raise for having to put up with people like me! Thanks for the opportunity to play.

One more note probably worth saying, for those thinking about coming to the show Friday, we'll be up in the Target Lounge. When you walk in take the very long escalator to your right up, then take a left at the top and we'll be in the lounge area just up on your right.

The weather was crazy nice here the last couple days. I think it hit 70 yesterday. I was able to sneak out for a short ride yesterday in the warmth, it felt great riding in shorts and short sleeves. I was hoping to ride a little dirt as I love fall mountain biking, but they had Battle Creek closed again this week for a controlled deer hunt, and I didn't feel like going farther that that, so I took out the road bike. I've been really diggin' my road bike again, now that I finally figured out what was creaking on it. All summer it had this creak, once per pedal stroke, seemed like the BB, but amazingly it would usually go away when I got out of the saddle. I must have greased everything in the drivetrain, seatpost, saddle and pedals to no avail. Things like that really bug me, I mean enough that I didn't even want to ride the bike. It's not necessarily the sound that bugs me either, it's the principle. It's like a sign that my bike isn't perfect, and I can't figure out how to fix it. That bugs me to no end because I like to think (yes, I have some ego issues) that I can fix anything, especially on a bike.
Well, I finally found the creak, it was the stem clamp on the steerer. All the bolts were dry just the slight shifting my weight when pedaling was enough to make it creak. Greased everything up and it's been beautifully silent since. I love a really quiet road bike, it just seems right.

I probably don't have to tell anyone reading this, but this weekend:

This is it, the last MN race of the year, the State Championships. Git yerself down to Basset Creek Saturday to race, volunteer or just spectate. It'll be bigger than ever and you'll be kicking yourself until next Buck Hill season if you don't show up.

bbbb

Tuesday, November 07, 2006

Short stories

Two kind of funy stories today. First off, it's November 7th, get' yer arse out and vote. Please.

First story has to do with voting. I went to my polling place to do my civic duty. As usual there were quite a few seniors there and there was a small line. I signed the form and got my ballot, then proceeded to get in line for a booth. The kind woman directing the line said a few times that the new electronic polling machine was available, but nobody would use it. The polling had been open for almost 5 hours and she said only one person had used it.

So I said," I'll give it a shot, is it self-explanatory?" All the seniors in line looked at me like I was a crazy fool, trusting a machine to fill in the little circles for me! As soon as I sat down at the machine I could tell, all eyes were on me. It was very simple, feed your ballot in and then it walks you through each item on the ballot one screen at a time. You simply touch the person you want to vote for on the screen, it highlights that person and you touch another button on the screen to move onto the next question. At the end it gives you a summary page to check your selections, then it prints right on the regular ballot card, filling in the circles you noramally would with a pencil. Then it kicks out the ballot, you can look at it and check it over, then put it in the ballot box to be couted just like everyone else.

The volunteers were thirlled that someone had actually used the computer. It really wasn't anything special, it wasn't any easier or harder than filling the thing out by hand (unless you really hate filling in circles with a pencil). But each screen was really clear and obvious as to what you were voting on. I could definetly see how it scares off people who don't use computers, but come on folks, this is 2006 I'm not one of 2 people in my polling district who have ever used a computer. Try it out, you might like it!

Story Two:

As you know my band, Derailleur has a show this Friday night at the new Guthrie theater. The guy who set-up the show had asked me to meet him today at 11:30 to go through where to load in, where we'd set up, etc... That's an unusual amount of forethought for the type of places we usually play, but this is the Guthrie, so I figured it was ok and I agreed to meet him.

So I get there at 11:30 and the guy is running a little late. Once he shows up, I introduce myself as Bob and he says "Oh I thought you were scheduled for noon." I told him I had 11:30 on my calendar, but whatever, I'm flexible. So he seems kind of flustered and says, how about a tour of the place first, then we'll meet one other person to discuss things. I'm thinking ok, how much can we really need to"discuss", but a tour sounds cool, so sure. So he proceeds to give me a full tour of the whole new building, behind all the stages, each theater, all the costume and prop building areas, the works. I'm thinking, man this is great, then he says we're going to lunch!

The whole thing is odd. I mean he never mentioned where we'd be playing during the tour, we went through several bars. I even ran into my Cousin Ann (hi Ann! Thanks for letting me know about this opportunity) along the tour and we talked about the fact that Derailleur would be playing Friday night and she'll bring some folks over after the show. Next he says, it's time for lunch, which kind of shocks me. So we sit down to lunch at the restaurant on site and he starts askingabout my connections to the Film Board, and such. I'm like, ahh I don't have any connection to the film board.... Then it all came together and I said "I don't think we're having the same meeting!" His eyes opened up really big and he figures out who I am and has a moment of panic because he's appearantly supposed to be meeting a memeber of the Film Board who is also named Bob at noon! He forgot about me coming in at11:30 and assumed I was the Noon Bob. So he's really embarrassed, I'm really embarrassed, I tell him he better get to his meeting, and I'll take off. I just ask him to email me specifics of what we need to do Friday.

I left to go back to work to find out I had a parking ticket because his tour took over 30 minutes and I figured I'd be in and out in about 15. damn.

He called me back later and felt really bad about the error, which was really an honest mistake. Heck I got a really cool tour out of the deal, so I wasn't too worried about it. We got our arrangements sorted out and all's good.

What an odd day.

please vote today. really.

bbbb

Friday, November 03, 2006

many small topics

It's Friday and what better way to end the week than to recap a bunch of smaller things that occurred this week.

1. Let's start with some shameless self-promotion, rock-n-roll style. The "worlds greatest rock band" Derailleur has a big gig coming up. We're going to be playing at the new Guthrie Theater's lounge next week Friday (Nov 10th) after the opening night of their latest play EDGUARDO MINE. We'll be the only act, so it'll be a Friday night of acoustic and electric tunes, 2 full sets in a clean nice lounge setting. In otherwords, pretty much unlike any derailleur show prior. I don't think there's a cover and we'll go on around 10:15 and probably play all night if you can take it.

2. Hot tub is in and on! Finally got the electrical straightened out, there was an airlock in the circulation pump preventing water from getting pumped to the heater and the heater had a second hidden reset button on it that isn't mentioned in the manual. Thanks to the Hot Springs Dealer for showing me how to reset that.

3. 953 frame is getting the final surface finish, it looks good! Most of the parts are in, once I clear-coat the fork it will just about be ready to go out.

4. Headbadges! yes, people have been asking me for these for a while. I'm finally having a batch made up. They'll be cool, trust me, and hopefully will provide me a template for making an engraving stencil so that I can do more logo engraving on misc parts with my new engraver.

5. BB Fork Crown?!? Yes, rumors are true, I've been working on a super-custom, super bbbb type fork crown for a while. I've gone through about 5 design iterations now and supposedly the first prototype for inspection will be shipping to me next week! It'll be wide, mtb style, Bridgestone inspired, but with improvements to make it stronger and fit more modern frames/tires.
Here are a couple of images of the 3D design. It has lots of room for customizing and a nice flat surface on top for engraving my logo on both sides. My hope is to use these on the 2nd semi-production 29'er frame (the rigid singlespeed) and to offer a rigid fork option for the geared, suspension corrected frames. This will give me a way to make a fork that fits with the theme of the fully lugged frames.

Hopefully, if the prototypes pass testing, I will have these early next year. One note to other framebuilds whom I know read this, please don't bother asking about buying these yet. I'm not in a position to sell them to other builders yet, but I'll let folks know if/when that might happen.
I'm really excited about this project and hope it pans out. It's take a lot of work to design this in a manner in which it's affordable to manufacture in smaller quantities.

6. Semi-production frames are getting closer. First round will be a geared, suspension corrected 29'er, fully lugged, classically styled, and with some really clean and tidy looking sliding horizontal dropouts. That will make it a pretty darn good all-around frame, run it geared, run it single, suspended, or get a cool suspension corrected rigid fork from me. Run discs geared or single (with disc mounts on the sliding dropout), or v-brakes or canti's. Look for 'em at The Route this winter/spring. Or hopefully at the Minnepolis Bike and Travel Expo.

7. State 'cross race is coming up, get ready!

bbbb

Tuesday, October 31, 2006

953 part 3

I've got lots I could talk about here this week, but I guess I'll start with 953 stuff since I know there are quite a few people just checking for that. Here's the next round of pictures. The frame is actually finished now.

With the front triangle done and the dropouts in the chainstays, it's time to attach the rear triangle. I usually jig up the whole back end at one time, then tack it all. Chainstays to BB first, then seatstays to seatlug and seatstays to dropouts. The chainstays are very straightforward, seatstays take a little more time to jig up correctly. For this frame the customer wanted them fastbacked to the seatlug. The slant six seatlug has a lot of area on the backside perfect for this type of attachment. Mitering fastback seatstay can be tricky though. They're very time-consuming to do by hand and tough to get to match perfectly. It's easy to miter one stay to the tube, the hard part is making the other stay match in perfect symmetry. Fortunately for me, with my mitering arrangement I can miter the seatstays for fastback attachment on my horizontal mill and make them pretty much perfect on the first try, it's a huge timesaver over filing.

Here's how they looked mitered up. Sorry about the bad picture, it was taken with my phone, couldn't find the camera that day.


Once the seat-tube end is mitered up just right I make sure the dropout end is cut right and it's ready to tack. I tack everything in the jig to make sure the dropouts are in the right spot, then take it out, put it on the alignment table to measure it and once I'm sure it's dead on, braze everything up in a workstand.

Here's how it looks after removing the flux and hitting it with some 80 grit. There's virtually no way to file or sand between the stays, so you have to make sure you lay that silver in there perfectly with the torch. I kept the fillet as small as possible as I didn't want a large amount of silver showing around the seatlug (remember, no paint).

This is without a doubt the hardest brazing to pull off on the frame. The lug is brazed to the tubes with silver so you need to be very careful not to melt out that filler while brazing the seatstays onto the lug.

As you can see, I keep a uniform sized fillet all the way around the stays. That's not easy to do, but again, since there's no paint to hide anything I want it to look good. I want every detail of this frame to be as clean as possible and really show off the built.

And finally, here is how it looks after finishing up the seat-post clamping slot and cleaning up the seatlug.

One challenge that came up on a frame this size with compact geometry and 19mm seatstays is the length of the brake bridge. The rear end is very tight on this frame, 40.5cm chainstays and a sloping top-tube means the seatstays are quite short. When combined with the fastback attachment that makes a very tight area for the brake bridge.

The bridge that Reynolds sells with the tubing is great, perfectly machined, looks like it might be a Paragon Machine works bridge, but made from stainless. Unfortunately in this case I would have had to cut it down so much that it would be very difficult to braze it in without making a large fillet. I didn't want a lot of silver around the bridge because I felt it would detract from the look, so I made my own bridge that fit the bill better. I had to machine it from 1" round stainless stock, then mill off the faces to attaching the brake. Then I milled out the underside to keep it light. The nice part is I was able to machine it on my vertical mill to fit the stays perfectly, so when it's time to braze I was able to just sweat in silver and braze it in pace with virtually no exposed fillet. Very clean looking.

Here's the finished dropout treatment as well. I have to admit Reynolds did a nice job of sizing the dropout tabs to fit the tubes, I hardly had to file them at all to get to the finished shape shown here. The tabs match the OD of each tube exactly. I chose to file the tabs down to fit them inside the tube ends rather than my usual technique of slotting the tubing. This made for less exposed silver in each joint and a cleaner look.


Finally here's the fully built frame. I won't say it's finished because I still need to put the final finish on the stainless, but all brazing and filing are done. I'll have some pictures of the frame with the final finish in the next episode.


In other news....

I took yesterday afternoon off work, it was what will probably be the last really nice day of the fall. About 65 degrees and sunny with a forecast of 30 and windy the rest of the week. It was a moral imperative to go for a bike ride. So I broke out the fancy road bike and headed to Afton. Spectacular day for riding, wearing shorts and short sleeves felt great. I wish my legs felt as good, but they made it though and I felt really good at the end. Today it's 35 degrees out and windy as hell, glad I rode yesterday.

I also spent some time this weekend and yesterday working on the latest house project:

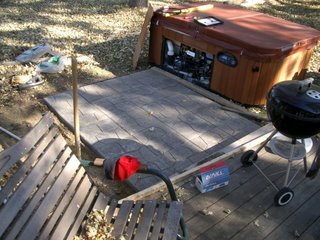
Yup, got a hot-tub. Never really thought I would, but the price was right, free. A huge thanks to my Sister-in-law's Dad who gave it to us. I had to put down a suitable pad to mount it on and I'll have to expand the deck slightly to give us a walkway. The pad went quickly but wiring it up has proven to be a challenge.

The thing has the craziest wiring I've seen. It comes stock set-up for 120v service, 20 amps. That's simple to hook-up, but it also limits the heater output and it can only run the pump or the heater, not both at the same time. So in an outdoor application the water would cool off pretty quick (especially in MN in the winter). So I followed the manufactures wiring diagram to convert it to 230v service. Well, they require a new bub-panel be installed in the vicinity of the tub, and that you have 2 GFCI breakers in that sub-panel, one of which is 120v, one is 240v. Very odd. To make it worse apparently every other hot-tub on earth just uses a single 50amp GFCI breaker in this sub-panel because they sell kits to accommodate that all over the place for pretty cheap. But the internal wiring in this baby is set up as two discrete circuits, a 20amp 120v and a 30amp 240v. None of the internal wiring is large enough to handle 50amps, so You're really stuck using this goofy set-up.

Of course no home-improvement type place actually stocks the required breakers to make this happen (you need a 30amp, 3 pole GFCI breaker!). So after calling every specialty electrical supply place in town I finally found 2. One was $168, the other $120. I opted for the $120 since they were identical part #'s. So hopefully tonight I'll be able to finish this up and start heating some water.

So between the $160 worth of wire needed to run the sub panel, the breakers, box, concrete pads,filters, etc... This "free" project is up to about $500. Oh well, it's still a great deal since the tub would have cost 10x that alone and most importantly it will make Beth really happy (and me too!).

bbbb

Monday, October 23, 2006

Achin'

Saturday morning I woke up about 7 am. It FE06 day.

For the non-Kenwoodies, that's Fall Enduro '06. Meaning a silly long mtb ride all over the cities, done once it gets too cold for a ride of this length to be a good idea. It was about 30 degrees when I rolled out of bed and ate my 4 waffles for breakfast. At least I had been smart enough to get my bike and gear all set the night before, so I just loaded up and headed over to Minneapolis after breakfast.

As regular readers know, my usual 29'er is currently serving 'cross duty and I didn't want to hassle with changing that. My shoulder is still far from good, so I knew a ride like this on the 'cross bike wouldn't be a good idea, so I pulled out 29'er #2. That one has one of those new-fangled squishy forks on it and (gasp!) more than one gear! I bet you didn't know I had a bike like that.

I decided to ride that one in an effort to keep my shoulder in check, and because on every other enduro I've been the only one on a singlespeed, which is usually fine but right now I'm not in shape to keep up with a bunch of fast guys on pavement riding gears. It felt weird. I had taken the bike out for a little shakedown just to make sure it was still working right, and everything worked flawlessly, but it just felt different. I think it's the suspension fork, I'm just so used to the rigid fork. It also felt heavy, even though it's not really. It's a 23 lb suspended, geared steel 29'er, but compared to my rigid single it felt like it weighed 100 lbs on every climb.

We left the coffee shop about 8:30 after waiting a little be for no-show-tree to not arrive. It was Stone, WW, Thorny, Billy and myself. Of course after all that bike changing, Thorny shows up on a singlespeed (dammit). We roll down to Minnehaha falls and start in on the singletrack. There's a lot of pretty technical stuff in there, and I was actually feeling better about the squishy fork and big tires in there. Man I forget how good tires other than The Crow's hook up!

As usual things fell apart in there. We got separated (happens every time) but eventually got back together at which point Billy decided I was still hurting from riding too many laps at Wirth the previous weekend (25 laps). So he pulled the pin and we were down to 4 riders.

We rode the usual route, down the dirt all the way to the riverbottoms, then across to Bloomington. About halfway across though Throny decides to heat it up and goes full time-trail pace to the Ferry Bridge. I shot off the back as I wasn't sure I'd even make it home riding that pace, much less be able to do the 'cross race the next day. We all hooked back up at the Ferry Bridge and prepared for the return trip. While we were waiting this guy on probably an '89-90 Giant mtb flys by wearing garp which coordinated with the age of his bike, black tights, white knit long sleeve top and neon green fannypack! He took off into the woods and we headed out a minute or so later. About 4 miles in we finally caught up to him and he picked up the pace. We weren't slacking off to begin with and honestly I think we were pushing it keeping up with him. We all finally had to stop at the raft to cross 9 mile creek, so we got to talk to him. Turns out he lived nearby but said he hadn't ever ridden those trails before nor really mtb'ed much. His bike was sporting what appeared to be the original Farmer-John tires with absolutely no tread left down the middle. This guy was ripping it up as fast as us having never ridden the trail and hardly ever ridden a bike off road and he was on bold tires! tough. He tagged along with us for the rest of the riverbottoms, rode behind us, but never really dropped off.

Time was clicking by faster than we figured and everyone was starting to feel the ride, so we decided to hit the asphalt back by the airport then down to Fort Snelling and in. Amazingly Thorny seemed as spry as usual. I don't know how that guy does it. I was in full cramp mode on the last stretch of paved path, and it looked like WW was close as well. We fumbled our way back to the coffee shop and clocked in 5 hours from our departure. Not bad for a cold day.

I slammed down a big burger and a brat and felt much better. Which was good because I still had a lot I wanted to do that day. One the way home I swung in by Tomac's house. He had recently completed a paver project similar to mine and had some extra sand left. I picked up those and headed home. It was about 2:30 when I got home which meant there should be enough daylight left to finish out the pavers, I just hoped my body had enough left to do it. So I took a quick shower to warm up and headed back out to rent the vibrating compactor I'd need and start laying the joint sand.

This part went pretty well, I pack all the pavers down and they got nice and flat, then started sweeping in the sand. The locking sand is unique, it's a polymeric sand which actually bonds to iteself and the pavers once it's wetted. So I made several passes, filling in sand then running over with with the compactor, vibrating the sand into each crevice. Once I was comfortable that all the gaps were full I'd move onto the next area. I worked until dark and then a little more, but I did get all the sand down and packed that night. I couldn't do the wetting part because it was too cold, so that had to wait for Sunday.

Getting up Sunday I still had a little shred of thought in me that I'd do the 'cross race. However my shoulder was completely worked over from the Enduro and running the compactor the night before (don't worry, the doc assures me I need to keep using it as much as possible and that I'm not hurting it any worse by doing this stuff). I decided maybe a test spin would be good to see how I felt. I grabbed the cross bike and headed down the road. I had my answer within seconds. No. My legs were actually alright, but my butt and shoulder were telling me no. So I stayed home and felt soft for not racing, but what can you do. I sprayed a frame and did a bunch more yardwork instead, lower impact stuff. I filled in a bunch of low spots in the front yard and raked some area's out. Then went in and did a little work in the shop. It was a good recuperation day. I made it to almost 9 that night before falling asleep on the couch.

More 953 pictures coming in the next edition.

bbbb

Thursday, October 19, 2006

More 953

So I'm getting pretty excited for this first full stainless frame to be done. It's very close and it just keep looking better and better to me. Since it's not getting painted, it will show off every detail of the workmanship with no option for covering up mistakes. I actually think that's why I like it so much, it looks pure and clean to me, stripped down to the bare essentials and yet really good.

I finally downloaded the next wave of pictures, so here goes, I'll try to pick up where I left off with the last pictures.

I think we left it at the tubes being mitered. Once all those are done, I jig the frame up and test fit all the tubes in the lugs and check the geometry.

Once I confirm that everything is fitting as planned, I disassemble it, prep all the lugs and tube ends and then flux it all up. Stainless steel is far more fussy about cleanliness than regular steel and seeing how both the lugs and tubes are stainless here, I made sure everything was as clean as possible.


Here's how things look fluxed up. I used lots of flux, especially for stainless. Making sure there's no particles or anything else in the flux to contaminate it. Stainless is very different to braze because it behaves the same as regular steel during the heat-up phase, but once it's up to temp it can overheat instantly if you're not careful. There's far less margin of error than with regular steel.

I just use regular Gasflux brand type U white flux for stainless. I know many folks use black flux as it goes to a much higher temp, but I don't like it as much and I think it can encourage overheating on stainless. I personally feel that if you're brazing properly you shouldn't have any problems with type U flux on stainless. I use it for all my S & S couplers as well.

Below are the BB and the seatlug all fluxed up and ready to go.


Once everything if fluxed I start tacking the frame right in the jig. I braze one part of each lug. Once it's tacked, I pull it out, make sure it's aligned and then proceed to braze each joint fully.

Here's a picture taken while brazing. As you can see the flux gets all clear and watery, that's how you know it's up to temp. I get the whole lug up to this point at the same time, by heating it evenly over the entire surface. Once it's up to temp, I quickly add silver and work it through the lug with the heat of the torch. You can see the two locations I added silver from in this picture, near the bottom of the headtube band and on the underside of the downtube socket. I flow the silver through the rest of the lug from these points.

I used 50N silver on all these joints. It does seem to work slightly better on stainless, but it also tends to flash out farther than 56 silver. Meaning it gets on the lugs a little more, but so thin you can't feel it, and the flash cleans sands off easily.


After brazing the whole thing is soaked in water for a few hours to remove the flux, then I sandblast the joints to remove any residue and clean them up. At this point you can really see how you did on the brazing and if there's any cleanup work to be done.

This lug looks really clean, meaning I did my work well, so I can proceed to sand the lugs down a bit and smooth the finish.


Here's how things are looking after some sanding on the lugs. Notice all the lug edges are very clean, no excess silver, no gaps. Nothing but nice clean sharp edges. That's what I was talking about at the start of this entry!

I sand them down to make sure all the surface irregularities from casting are removed and to make them smooth and flowing.

If everything is done right, this is how it should all look, just a fine tiny line of silver at the lug edge, crisp edges all around and no material removed (sanded off) from the tubing at the lug edge (undercutting).

I clean up all the other lugs in the exact same manner and move on to the rear triangle, starting with the chainstays.
As I mentioned in an earlier post, Reynolds has their own 953 dropouts. They are very well made and match the tubing diameters perfectly. So in this case I decided to just round the top and bottom of the dropout tab slightly to make it fit inside the chainstay rather than slot the stays. Same look, but this is probably a slightly stronger construction method.

The dropouts are actually made of 953 material, so they're strong, very strong. But they still file pretty darn well, I'm amazed at this material.


Again, I flux the heck out of everything and position the dropout correctly in the stay. One work of caution here. You really need to make sure the angle of the dropout and position are spot-on with the 953 dropouts. They're actually too strong to cold-set. I was unable to bend them at all without the aid of heat! I'd recommend a jig for installing them to make sure you have it right.

Again, since they're stainless, only silver filler will work. So I filled these with 50n silver, which is about the only thing that can fill a gap that big. Even at that, it's not the easiest braze.

Here's how it looks after brazing and soaking off the flux. Notice the natural fillet of the material, that's what you want since I'll be scalloping this area out in the next step.

The silver fills up the gap about all the way along the tab inside the dropout, so that chainstay is filled about 1-1.5cm back into it. With the current silver prices, that's probably $20 worth of filler in the dropouts!


Next step is what I consider one of the highlights of any well made frame. Scalloping the dropouts. This is the traditional way to finish dropouts and it takes some skill to make it look really sharp. The key here is the scallops should be even, vertical and not undercut at all into the actual dropout. I also prefer the look shown here where the top and bottom of the dropout tab seamlessly blend into the stay. I think this is able as clean a look as possible. It makes me really dig the shape on these Reynolds dropouts.

When using this technique, the driveside dropout needs to have the scallop ground further up into the stay for clearance to the cassette cogs. The amount of space needed is a function of how large the smallest cog is on the cassette.

But this means you need to plan ahead a little and be sure to fill in the inside of the drive side dropout with more silver, or start the fill further up the stay.

Again notice the dropout is angled in to make sure the axle camping face is perpendicular to the axle. My jig worked pretty well and things came out nearly spot on. Which is a good thing since I don't have much hope of cold-setting those dropouts now that they're brazed in. I guess one could use heat, but you risk melting out part of the braze if you're not careful. Better to do it right the first time!

Well, that's all I have time for right now. Look for the remainder of the build pictures to come soon.

bbbb

Monday, October 16, 2006

house keeping

A couple details I've been meaning to mention on here.

First, if there are folks who've tried to email me from a Comcast email account and had it bounce back I appologise. There seems to be some kind of issue between my web hosting company and comcast. If you have another email service try using that to forward me the returned mail message. Also if you've gotten a returned email to me from another domain and have a means of letting me know I'd appreciate it. I'm trying to figure out what's happening.

Secondly, I get people often submitting the same comment multiple times. I have to assume this is because you submit the comment, then don't see it appear, so you resubmit it. Well due to spam issues I moderate all the comments on here, so your comment won't appear until I go in and approve it, so be patient, it'll show up!

bbbb

'cross

This weekend had lots of bike-related stuff happening. Saturday I managed to spray a couple of frames earlier in the day, then wrap up the last of the sidewalk on the house. After that it was time to clean up for the Vitch's (John Coleman and Kate Carpenter) wedding reception.

What a great time that was. It was held at One-on-One bike studio in Mlps which was the perfect venue for this event. Amazing how well that place cleans up for a bike shop! All the usual Kenwoodies were there to celebrate and a few other friends I hadn't seen in quite a while. One thing is for sure, the Vitches sure have a lot of really great friends. A good time was had be all as far as I could tell.

Sunday was the Boom Island 'cross race. I really wasn't too sure about this. First off, a lot of us were at the wedding reception till about 1am or later and of those I think most were bound to be hungover. Secondly I hadn't actually ridden my bike at all since the Lake Rebecca race the week before and my shoulder was still questionable and quite sore. The doc had assured me though that it would be ok if I wanted to ride.
So I headed to Boom island still not certain if I'd race or just watch, but once I was there, I had to give 'em my $20 and put myself through some misery. I decided I was going to take it easy and not risk any crashes on an already injured shoulder, so I lined up near the back. Big mistake. The race had 78 people in it on a course that was appropriate for about 30. The first couple of barriers I literally had to stop and wait in line to get up them. By the time I got up the second run-up I could see the front of the pack was already a full half lap ahead of me. But I figured I'd just pick people off once it thinned out.
It never really thinned out much though. I can't recall any part of the race where I was riding alone, and I was passing folks almost constantly for the first 6 laps. That's a great morale booster. The course was really set-up quite well, especially for singlespeeding. There were three sets of barriers plus one run-up that you literally had to dismount and run. So 4 dismounts per lap. It was clear that I was outclassed fitness-wise, but I think I made up for it on all the dismounts and remounts. I seem to pass the most people during the couple of seconds I was off the bike rather than the times I was riding. Guess I ought to spent a little more time getting fit. I have no idea where I finished but I know it was a lot further ahead of where I started, so I'll call it a victory.

Shoulder felt fine while riding, but it's still pretty sore today. I guess I'll probably have to do a little PT as the doc recommended, but that's not too bad. Much better than what it could be.

In other news, Terry Bill From Reynolds tubing was kind enough to email me in response to my last posting about 953 weights. He's such a good guy to deal with, and explained that they're using brand new dies on the current batches of 953 which can lead to the thicker walls, but that as the dies wear in, the spec should also become closer to the advertised specs. For the meantime I'm going to keep measuring tubes and setting aside the thicker ones for frames that need a little more material, and using the light ones where appropriate. Thanks Terry.

bbbb

Wednesday, October 11, 2006

so much happening

I was hoping to do a second 953 update here, but I haven't gotten around to collecting all my photos again. So no pictures yet, but I did however get my next shipment of 953 which is from yet another manufacturing lot. That makes three manufacturing runs that I've received tubes from now and disappointingly this lot was virtually identical to the previous two. Most of the main tubes are over the spec for wall thickness and therefore weight. I did get one 31.7 tube that was nearly right on the spec though. Here's the average weights look now after measuring multiple samples of each:

Tube # Claimed weight Actual weight
SS4130 220g 245g
SS4120 245g 249g
SS4200 238g 290g
SS4210 267g 300g
SS4730 200g 225g
FS4520 (pair) 278g 310g
GS4602 (pair) 288g 267g (yes the stays are actually lighter than claimed)

Pretty much all the 31.7 tubes measure out about .6/.4/.6 butting. The 35mm tubes are thicker .7/.5/.7 or close even the ones that are supposed to be .55/.35/.55

I don't think this is necessarily a bad thing as I like tubes with these butt thicknesses, but I think it would be of great benefit to builders if a $600 tubeset actually met the spec. I'll continue to use it, but I just won't expect it to be as light as claimed. That actually makes it a much more versatile tubeset. I'll be curious to see how the Columbus XLR compares.

On to other news...

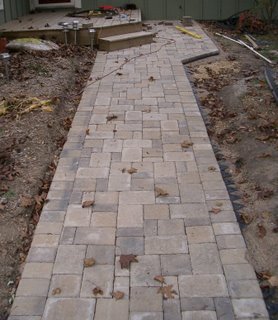
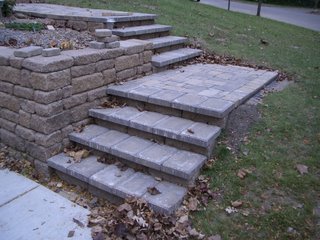
This weekend I decided to take advantage of the nice weather and try to finish up building the front sidewalk. I took Friday off to get a head start putting down the sand and leveling it for the pavers. I ended up hauling about a yard of sand in to get everything to final grade. Next I put down the first set of caps on the steps as those would determine the starting edge for the pavers. Then finally I started laying in pavers to form the walk. Here's how things looked at the bottom set of stairs (which is where I started).


I took a little break from the pavers Saturday morning to go over to my folks place and help them re-roof their shed. That went quick smoothly and we had it all wrapped up before noon. Then I headed back home to hit more pavers. Things went faster than expected and we managed to finish up most of the sidewalk. We really like how the cobbles go with the aged feel of the retaining wall and the stone on the house.

We just have to put the locking sand down between the cobbles and run the compactor over the whole thing and it'll be done.

Sunday... The Lake Rebecca 'cross race was Sunday and I was excited to start my 'cross season. I had missed the first two races due to being out of town, so this was going to be my first. I've always liked this course, it's a shorter loop, but with a nice run-up in the woods and a second grassy run-up that I tend to do well on. Both run-ups are long enough that those with gears usually remount and ride them, but I find it's faster for me to run them since I've only got one gear and it's big!
I registered for the B race since I haven't been training much, it seemed appropriate. It was raining at the start which also seemed appropriate, but made for a greasy course. We had gone about halfway around the first lap when things went awry. I was fairly close to the front and feeling good with my position when someone went down immediately in front of me. It was really, really early in the race so the pack was still very tight and I had no room nor time to find a line around him, so I ended up riding right into him. I pulled up as hard as I could, but my front tire got caught up in his bike and threw me right over the bars. While landing I felt a distinct pop in my shoulder and figured I was out of the race.
I got up really fast and felt ok, aside from a little soreness in the shoulder and some blood running down my leg, but I noticed the other guy wasn't up yet (probably partially due to me landing on him and his bike). I helped get his bike off him and asked him if he was ok, to which he replied yes, but he was still doubled over in pain so I hung around. Once he was upright enough to walk back I picked up my bike and began to finish out the lap.
Backing up a minute or so, after I immediately got up, I moved my bike out of the main line in the trail. Despite that someone else got tangled up in it. They didn't crash, but nearly tore my front wheel off by yanking on their bike while their pedal was in my spokes. Nice. Then I finally yelled at him to stop because his pedal was stuck in my wheel, I removed his pedal from the spokes and he yanked the bike hard, scraping his pedal all the way down my fork, tearing off about 6" of paint with it. Bonehead. That part pissed me off.

Anyways.... I finished out the lap, and pulled in at the start line to tell them everyone was alright and to get some tools as my stem was turned and my brakes we messed up. I spent a couple minutes fixing the bike and decided I didn't feel too bad, so I went back out and raced. Of course this all happened on the first lap, so when I headed back out I was really far off the back, but who cares. I just rode hard picked up places where I could and finished out the race near the back. I still felt good for finishing.

Later that night though I really started feeling some pain in the shoulder. I iced it and took some advil and tried to sleep that night. Still hurt a lot in the morning so I went to the doc. He said it was probably pulled out of joint partially during the crash and is just really inflamed, so I'm on big anti-inflammatories for the next few weeks. As long as I didn't tear any of the rotator cuff he says I should be back to racing in a week or two. Here's hoping.
unfortunately the guy I ran into didn't fare as well. He walked out and looked fine at the finish, but it turns out he broke a rib and I'm sure is far more sore than me.

So I'm laying low this week, taking it a bit easier trying to heal up so I can still get in a couple more races before the season ends in November.

bbbb

Thursday, September 28, 2006

Reynolds 953

I finally got around to downloading my first round of pictures of this 953 build. Since there doesn't seem to be much information out there yet about 953 or working with it, I'll try to be as descriptive as possible on my experience. But first, a warning.... new builders are always eager to try new materials. This stuff isn't easy to use and it's really thin, I really don't recommend using it unless you've got a good number of frames under your belt and you've brazed a lot of stainless.

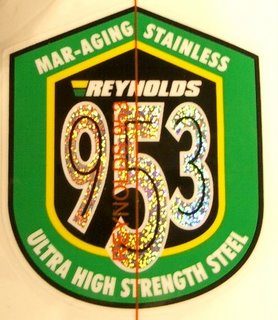
But hey, look at the sparkly tubing decal!

Ok, down to business.
Here is the complete tubeset that I'm using for this frame. Ignore the appearance of the curve in the tubes, that's simply my bad photography skills shining through. The tubing is very straight actually which is even more impressive since this is the Aged (heat-treated) tubeset. Reynolds offers several options in the tubing in 28.6, 31.8, and 35mm tubes. Put simply, they have 2 wall thickness profiles and 2 butt length options to chose from in each diameter. Most of the tubes are on the long side, so for smaller frames, you almost have to use the long-butt tubes and cut off a good chunk of length. For this frame I chose the thin-wall, long butt tubes in 31.8mm top and seat tubes and 35mm downtube (to fit the slant six lugset). The raw tubing has a very good surface finish and as I said is very straight, however it's not very round, especially in the thin portions of the butts. Both the top and seat-tube were about .025-.035" out of round in the center section. The wall thickness is consistent (I measured both ID and OD and had identical out of round values) so it shouldn't affect the strength of the frame, but it's a little annoying to deal with. The downtube was closer, it was only .010" out. I suspect this may be due to the aged tubeset, that the distortion occurs during the heat treatment which is good for me, I'd rather deal with this disortion now before the frame is built than afterwards which could happend with tig-welded frames. Also the wall thickness was slightly thicker than claimed, but that can be a function of die wear at the manufacturing facility.

I ordered the whole Reynolds Happy-meal package with this one, so that includes a set of 953 dropouts and a really well made stainless brake bridge. The dropouts are nice, basically the same shape as the Paragon dropouts, but made from 953 material then heat-treated. I'm using these because the 953 chainstays have a larger diameter at the dropout end than a traditional chainstay. They won't fit Henry James plug style stainless dropouts without addin a machined sleeve over the plug and I don't know fo any socket style dropouts that will fit. I prefer plate dropouts like this anyways, but these are really expensive (3x more than Hank!). Reynolds also lists the same dropout but in 901 stainless for a fraction of the cost, but they were out of stock. I've already seen quite a few new flat plate stainless dropouts coming to market presumably to fill this niche.

Lugs were the next challenge. This frame is going to be 100% stainless so it won't need paint. There are actually lots of stainless lug option out there these days, which is good. However with the very thin-walled tubing I don't feel using traditional oversize diameter tubes would provide a very stiff frame, so I wanted bigger. That left me with Kirk's slant six lugs which are absolutely perfect for this application. The drawback is that there was not stainless BB shell to match. I searched high and low, but nothing came up. In the end I had a small batch of them custom cast at Long-Shen, so I suspect I've got the only shells to make this work with the Slant Six lugs. All the frame fittings and braze-ons have to be stainless as well.

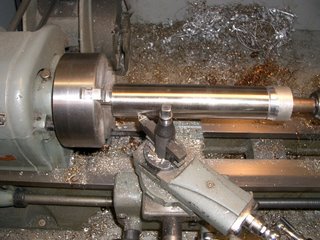
The keen observer will notice in the tubeset picture above that there was no headtube. Reynolds does not offer one, if you want a stainless headtube you have to make it yourself. Again, I searched for 36mm OD headtube stock, but didn't find anything easily available, so I turned my own. I had to start with 1.5" x 11g 316 tubing, then turned the OD down to 36mm and then bored the tube to 33.2mm ID.


Then while I had the tube on the lathe, I bored the ends down to 33.6mm so that after brazing the leadlugs, reaming the headtube would be easier (less material to remove). The stainless is harder to cut in general, so I want every advantage I can get for the final facing and reaming operation.

This was a lot of work to go through just to get a headtube, I'd vertainly prefer to find a source for 36mm OD stainless tubing in the future, but for this one I got an exceptionally round and well toleranced headtube since it was fully machined!

Mitering the tubing was not as bad as I was expecting. The aged tubeset is very hard stuff and Reynolds has warnings all over their website about how difficult it can be to work with. After doing some work with it, I can say it is tough, but not uncutable (like 853 after welding/brazing).
You really need a solid, heavy, rigid cutting set-up though don't try this on your joint-jigger running on a drillpress. In this picture is appears that the cutter is turning fast, but it's not, about 100 rpm actually and I'm feeding the tube exceptionally slowly (about 3x slower than I would with 4130). But as you can see, the hole-saw does cut it just fine as long as you use the right arrangment.

To give you an idea of how rigid things need to be, here's a picture of my tube-holding arrangement and the cutter arrangment. That's a 6" wide tube vise that weighs about 75 lbs mounted on a 15" rotary table on my horizontal mill. The cutter is held in a 1.5" diameter collet which is directly attached to the 40 taper drive of the machine. This thing has a lot of mass behind it (2200 lbs) and have no chatter whatsoever. I think this is about the minimum I would want to use to cut this stuff and not risk tearing or chipping the tubing.

Here's a sample cut, this happens to be the bottom of the seat-tube. You can see the cut is very clean, it just took a little longer to make it.

One other nice note, Reynolds was kind enough to mark each main tube with the tube part # right on it as they do with all their steel tubing. Really makes it nice to know which tube is which without measuring all the butts. I wish other manufactures would follow suit.

That's about all I have time for right now. I'll post more pictures when I have time. The front triangle is all mitered up and ready to go, I just need to get all those pictures together.

bbbb

Wednesday, September 27, 2006

lots to mention, little time

I know it's been a while since I updated. I've just been cranking on the house and shop projects lately, so I haven't been taking the time to write much. I even took a bunch of pictures of house progress, but of course haven't bothered to download them off the camera, so you'll have to wait will next time for photos of finished work.

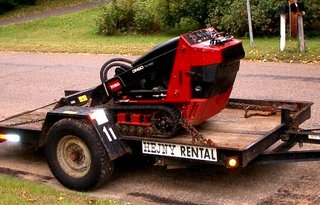
Since last we spoke, I started tackling the soon-to-be sidewalk in front of the yard. That meant a lot of digging. I had to remove all the dirt where the sidewalk would go and replace it with a 6" base of packed class 5 material. I also needed to dig out the extremely hard-packed earth at the end of our driveway inorder to prep that area for concrete to form our new driveway apron. So I splurged and rented a Dingo. This thing was great. It's basically a walk-behind bobcat with a smaller bucket, which makes it much more maneuverable and less damaging to lawns.
So I spent a full day running this thing and filling up trailerloads of earth, then hauling them to the back yard and unloading. I think I did about a dozen trailerloads in the end between the sidewalk and the driveway. We were able to really regrade the north side of the house well with all that dirt, should be much better for drainage.

Here's how the sidewalk area's looked after gettin' the dingo treatment. I took out about 6" of dirt, then the following weekend went back and filled it back in with class 5 filler and compacted it. So if I had a picture of how this looked now, it would be flat and hard and ready for some pavers!

Here is the driveway apron all formed up. This was the real reason for getting the Dingo. We had been driving over the dirt that was here for a year now, you can imagine how hard it was. I attempted to dig it out by hand twice. Both times I was out there with a pick-axe for several hours and made a total dent of about 3 cubic feet! The Dingo was well worth the cost just for this. After this picture was taken, I added the re-mesh and some expansion joints, then it proceeded to rain for about a week straight. Once the rain finally subsided, I dug out all the silt that had washed in and we poured it yesterday (pictures to come).

On the shop front, I've been busy too. I got a new toy, a pantograph engraver, which I have yet to even play with. Sometime soon I hope to be able to start learning how to use it, but I should be able to engrave frame parts now, fork crowns, BB shells, dropouts, etc... I'm pretty excited about that.

Cranked out a couple of S & S retrofits and misc projects, but my big exciting news is that I'm finally working on my first Reynolds 953 frame. I'd been waiting for months for this tubeset to arrive and the first one is here, with a second on the way. For those who are not familiar, 953 is Reynolds new super-high strength stainless steel. Currently it's only available in very thin dimensions geared towards racing frames. Columbus also just announced this week that it will be debuting a similar stainless tubeset at Interbike this year, undoubtedly to compete with 953.

Seeing that this is stainless, that opens up some options. The frame I'm working on will be completely stainless steel, all lugs, fittings, tubes! That means it won't require paint. The material is really designed to be competing with Titanium on all accounts (strength, weight, finish, etc).

I had some concerns about the material prior to ordering it. It's incredibly strong, which generally means very hard to cut or work with. They sell it in two forms, a standard version which is designed for tig welded frames and requires a post-weld heat treatment, and an Aged version which is already heat-treated to bring it to full strength (250,000-300,000 psi!!!). The aged version is designed for lugged construction since silver brazing will not heat the material up enough to damage the heat-treatment (which welding would destroy). But it's also fully hardened, so I expected to only be able to miter it by abrasive means. However upon working with it a bit now I've discovered I can miter it on my horizontal mill with a holesaw just like I do with any other tubing. The key is that I have an exceptionally rigid mitering arrangement and I have to feed the tubing much slower than regular 4130. It's definitely hard stuff, but not as bad as Aeremet was.

I have been taking pictures of my progress along the way on this frame, just haven't uploaded there here yet, but I will so watch for lots to come. There aren't a whole lot of 953 frames out there yet and even fewer lugged ones so stay tuned.

bbbb

Monday, September 11, 2006

'cross dresser

Yup, it's September and it was cold and damp this weekend. That can only mean cyclocross!!!

In preparation for the greatest sport ever, I've put phase 2 of my rigid 29'er plan into effect

A little shorter stem, drop bars and some skinnier tires and presto: Cross bike! This was part of my original design actually. When I was designing the geometry for this mountain bike I realized that it was nearly exactly the same as my 'cross bike, just with more tire clearance. 72 degree head angle, 75mm drop. Really the only thing I'd do differently for a dedicated 'cross bike would be a slightly shorter top-tube (but the 90mm stem makes this one acceptable) and a little shorter chainstay. Think of it as a 'cross bike with lots of mud room.

I threw the Cane Creek wheels on there, but I'm actually thinking about running the Stans rims and these tires without tubes. I just didn't feel like changing out the Crows that are currently on the Stan's rims. The King/Stans wheelset weighs pretty much exactly the same as these Cane-Creek wheels, but they are wider and might give me a little more meat on the ground for traction. Either way, I'll be going tubeless with the Stan's sealant for 'cross this year. I'll give a full report after a few races.

I did a short shake-down ride in Battle Creek on it last week, fine tuned the saddle height and angle to fit the drop bar position better. Then took it out Saturday for a real ride with Tommy Mac. We started at his place in Mlps, then headed down to Lebanon hills, did 2 laps there then high-tailed it back to his place. Turned out to be 4 hours, which was about 3 more than I'm in shape for. But the bike was good. I stuck with the 34:14 gear which feels pretty good all around. It's a little bigger gear than my usual 42:18 'cross gearing, but this bike is light and quick and it feels ok, think I'll stick with it.

In other news, I spent Saturday afternoon and all day Sunday finishing up the shed. It's done though with the exception of paint (which is about 1/2 done thanks to Beth). The trim took me a little longer than I expected, but it came out good and matches the house perfectly (it's really important that your shed matches your house exactly!). Sunday it drizzled all day, kind of right between drizzle and actual rain, which combined with 50 degree temps made for a mildly miserable day to work outside, but I really wanted to finish it up so I persevered.

Finally some good news (at least for my pocketbook): the Jetta is back and shifting great. After a week of bleeding the new slave cylinder every night, I finally gave in. I figured there was something else wrong that I wouldn't be able to diagnose, so I took it to a transmission/clutch shop. Had to drive it there in 2nd gear since I couldn't shift it at all while the motor is running. Once I finally got there, I told them my whole story, what had been leaking, what I'd replaced and what it was doing now. They were a little baffled, but thought I was on the right track. They said they'd start by just re-bleeding the system. When they called me back about 5 hours later, the guy said "we bled it, bled it, and bled it, then left it sit an hour and bled it and bled it and bled it again." Finally after several tried they got all the air out and it was shifting as smooth as silk. The only charge was for an hour's labor which was much better than the thousand dollar charge for dropping the transaxle to replace the clutch that I was envisioning. He hoped this was all it needed, and so far it seems to be working. I'll keep my fingers crossed.

bbbb

Tuesday, September 05, 2006

Laboring

Labor day weekend, the name says it all. This weekend's mission was to build a new shed in our back yard. I had reinforcements, well one anyways. Beth's parents came to town along with another couple who are friends of the family. So while all of them went out shopping, Beth's Dad (Bob) and I worked.

I had a pretty good plan layed out or so I thought. We wanted to put the shed next to the house, in a narrow strip of land that's pretty much useless. Unfortunately with all the Phone line work Qwest has been doing in our yard, they added an above ground junction box back there and dug in new lines through the area I wanted to use. Then I found out one of the neighbors still doesn't have working phone service off that line, so it's a sure thing Qwest will be back showing us their spirit of service by digging up our backyard again.

Therefore we decided to relocate the shed rather than have to move it when Qwest decides they messed up again. We moved it to the Northeast corner of our lot, tucked back in the trees. It's actually a great spot for a shed, fairly out of the way, and it blocks out some ugly parts of the neighboring yard. Downside is that it's on a hill, a short but steeply sloped hill which required some digging. So before we even started we were behind schedule since we now had to dig out a big chunk of earth.

Thankfully Pat (my contractor that did the addition) was working next door that day and he had his Bobcat there. It didn't take much to convince him to bring it in the back yard and do the digging for us. That alone saved us about 6 hours of digging through tree-roots trying to level the ground. What a guy.

Once he had worked his magic, we assessed the situation and decided we needed some kind of retaining wall to hold back the slope now. Fortunately it would be completely behind the shed, so it didn't need to be anything fancy, a few left over 2x8's and a couple posts worked fine. The first day we got the ground all leveled, placed and leveled the concrete blocks that would support the structure and built the entire base-frame of the shed. We wrapped that up by about 3pm and headed off to Menards to purchase the lumber we'd need to frame up the walls and roof the next day. That turned into it's own adventure.

We took my car (jetta wagon) with my trailer, same as I'd done about a hundred times throughout this project. Got to the store fine, and made our order at the lumber desk. Now, I had been having an intermittent issue with the clutch on the car about a month ago. Somehow the Hydraulic clutch had gotten some air in the line and wasn't releasing fully, making it exceedingly difficult to shift. I bled the clutch and the problem was fixed, or so I thought.

The car wasn't shifting very smooth on the way to the store, which has me mildly concerned, but not worried. But when I pulled it into the lumber yard to load up, it wouldn't shift at all. I could shift it fine with the engine off, but as soon as I started it, I was locked in a gear and the clutch wasn't releasing much at all, so stopping didn't work so well either. We continued loading lumber since it was all paid for and I figured I could get home. We had about 1000 lbs of wood on the trailer I'd guess and I came to the rationalization that I was going to have to drive home in second gear and not stop.

So we took back streets home, with flashers on the whole way. I could get the car to shift from 1st to 2nd with a bit of coaxing, but it was more like a powershift, which doesn't actually work well with this transmission. I'm not sure how Volkswagen designs their transmission, but there's no grinding or clunking when trying to force a shift, you simply can't move the shifter into position. period. Clever in that you don't tear up the syncros, but virtually impossible to shift if the clutch goes out, unless you have divine intervention to line up the gears just right as you're trying to jam the lever around. less than ideal.

So I left it in 2nd gear all the way home. I avoided stopping at all costs since I had to turn off the engine to actually come to a complete stop since I couldn't get the clutch to release much at all anymore. But eventually we made it home.

The next day we started off by bleeding the clutch again, I figured that would fix it for another week or so until I could figure out where the leak is. No dice. No amount of bleeding will get this thing to release. But during the process I could see a small amount of fluid coming from the slave cylinder bleed screw area. Got the car down to the garage and left it there, too much shed work to do, the car would have to wait.

We framed up all the walls pretty quick, then got going on the trusses. Once we figured out the angles for all the cuts, those went up quickly too. After that, we started on the siding, which really started making it look like a shed. We got about 80% of the siding up and were beat, so it was time to call it a night and get some dinner.

Sunday, Beth's Folks decided to leave town early to avoid traffic, so they were up at 5:30 to hit the road. We saw them off and promptly went back to sleep. I was still beat. Once I got up at 9, I headed out to see what I could get done. Unfortunately it was wet and the forecast was for more rain. I managed to get the last 2 sheets of siding up, but that was about it. The rain came and didn't let up all day and night.

I headed to the shop to finish up some indoor work that I had wanted to get done. I machined a neat little fix for a custom trike with a softride beam. The bike had the old clamp-on beam mount and the rider had crashed and broken the mount. Softride hasn't sold these for years, so I had to come up with a more robust fix. I debated brazing the right fixture on the frame, but that would damage the paint and still require me to make the fixture, so instead I machined out a new beefier clamp-on mount. This one should hold up for years!

It was kind of fun to make too, a nice machining project. Not to mention it'll get the owner back out on the road quickly, which was my main concern since this trike belongs to a woman with Muscular dystrophy and this is really her main transportation. It's a neat bike, upright trick with the beam, with a special mount out front specifically designed to hold a milk-crate nice and low where it's easy to load. I haven't heard of the maker before, the only decals say "Rain City" and it was supposedly custom made for this woman. Anyone heard of it?

Monday the skies cleared and I headed back outside to work on the shed again. I managed to get all the roofing up. That ended up taking far longer that I thought, but that wasn't due to the roofing, but rather the crappy 2x2 boards I had used to fasten the roofing to. I tried this new stuff called Endura roofing. It's a corrugated asphalt product that comes in 48" x 79" sheets. You simply need 18" spaced purlins to nail it to, no plywood to shingles required. I thought it would be a big time saver to install and it would have if I had made the purlins a bit more stout. As I was I ended up fixing or replacing about 1/3 of the purlins as I nailed roofing on. Frustrating, but in the end, It's all up and it feels pretty darn secure. I think it looks pretty good too.
The green on the siding is just primer, not finished color. Eventually it will match the house, which is a much darker green. Hopefully between the green paint and brown roof it will blend in pretty well with the trees.

I've still got to finish the siding on the peaks, build the doors, put up the trim and install the window. It sounds like a lot, but I think it should take one more solid day then it should be ready for final paint.

Now I have to go figure out what to do with my car....

bbbb