I finally downloaded the next wave of pictures, so here goes, I'll try to pick up where I left off with the last pictures.
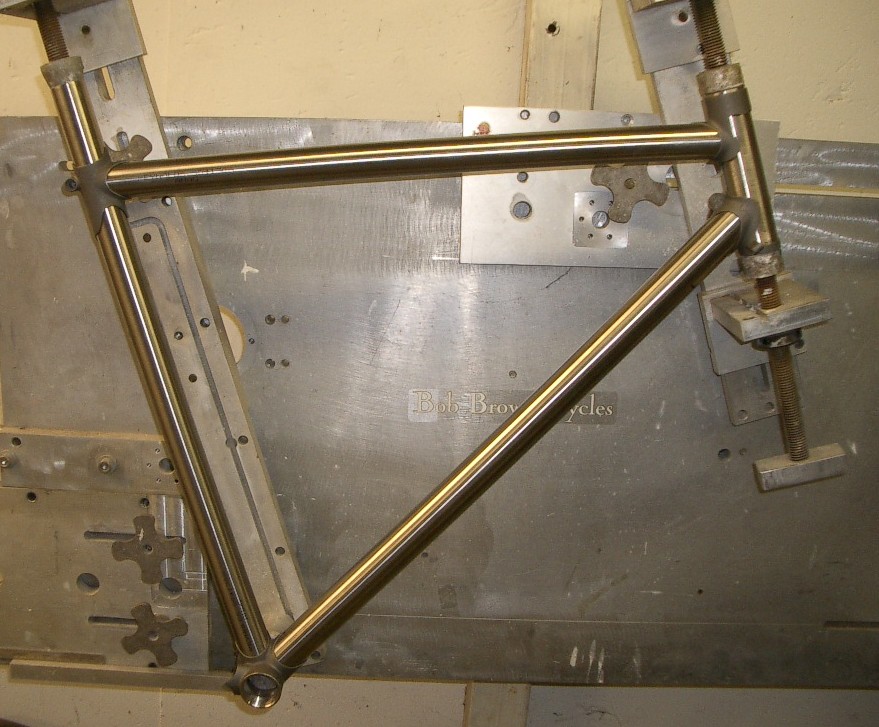 I think we left it at the tubes being mitered. Once all those are done, I jig the frame up and test fit all the tubes in the lugs and check the geometry.
Once I confirm that everything is fitting as planned, I disassemble it, prep all the lugs and tube ends and then flux it all up. Stainless steel is far more fussy about cleanliness than regular steel and seeing how both the lugs and tubes are stainless here, I made sure everything was as clean as possible.
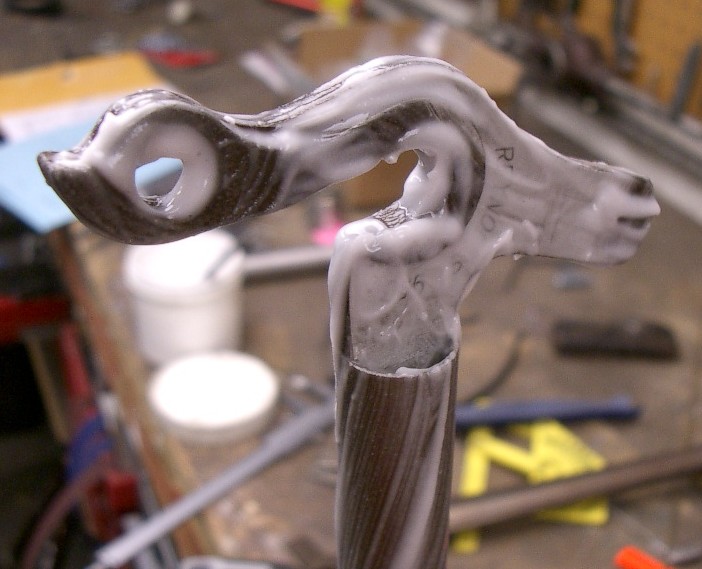
 Here's how things look fluxed up. I used lots of flux, especially for stainless. Making sure there's no particles or anything else in the flux to contaminate it. Stainless is very different to braze because it behaves the same as regular steel during the heat-up phase, but once it's up to temp it can overheat instantly if you're not careful. There's far less margin of error than with regular steel.
I just use regular Gasflux brand type U white flux for stainless. I know many folks use black flux as it goes to a much higher temp, but I don't like it as much and I think it can encourage overheating on stainless. I personally feel that if you're brazing properly you shouldn't have any problems with type U flux on stainless. I use it for all my S & S couplers as well.
Below are the BB and the seatlug all fluxed up and ready to go.

flux.jpg)
Once everything if fluxed I start tacking the frame right in the jig. I braze one part of each lug. Once it's tacked, I pull it out, make sure it's aligned and then proceed to braze each joint fully.
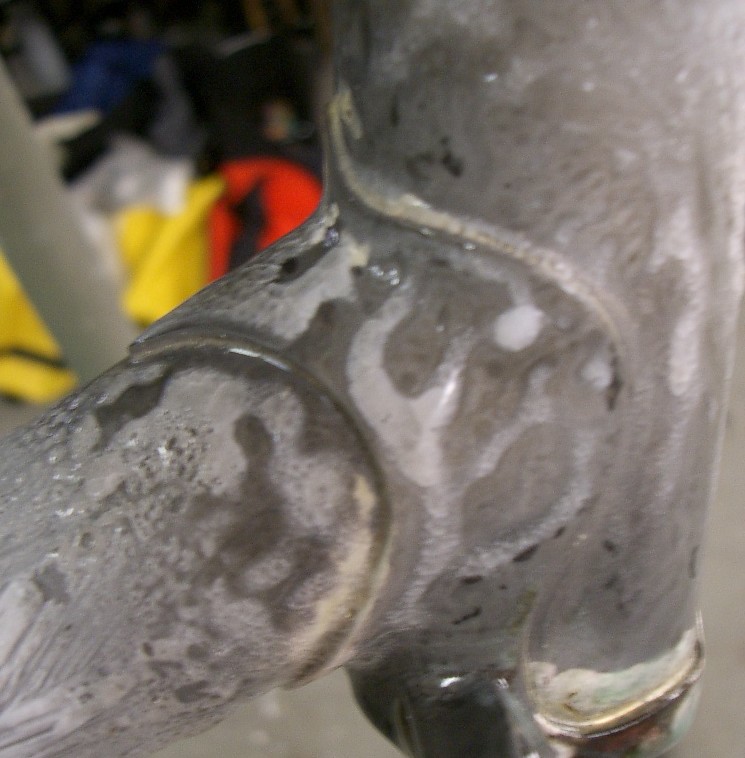 Here's a picture taken while brazing. As you can see the flux gets all clear and watery, that's how you know it's up to temp. I get the whole lug up to this point at the same time, by heating it evenly over the entire surface. Once it's up to temp, I quickly add silver and work it through the lug with the heat of the torch. You can see the two locations I added silver from in this picture, near the bottom of the headtube band and on the underside of the downtube socket. I flow the silver through the rest of the lug from these points.
I used 50N silver on all these joints. It does seem to work slightly better on stainless, but it also tends to flash out farther than 56 silver. Meaning it gets on the lugs a little more, but so thin you can't feel it, and the flash cleans sands off easily.
After brazing the whole thing is soaked in water for a few hours to remove the flux, then I sandblast the joints to remove any residue and clean them up. At this point you can really see how you did on the brazing and if there's any cleanup work to be done.
This lug looks really clean, meaning I did my work well, so I can proceed to sand the lugs down a bit and smooth the finish.
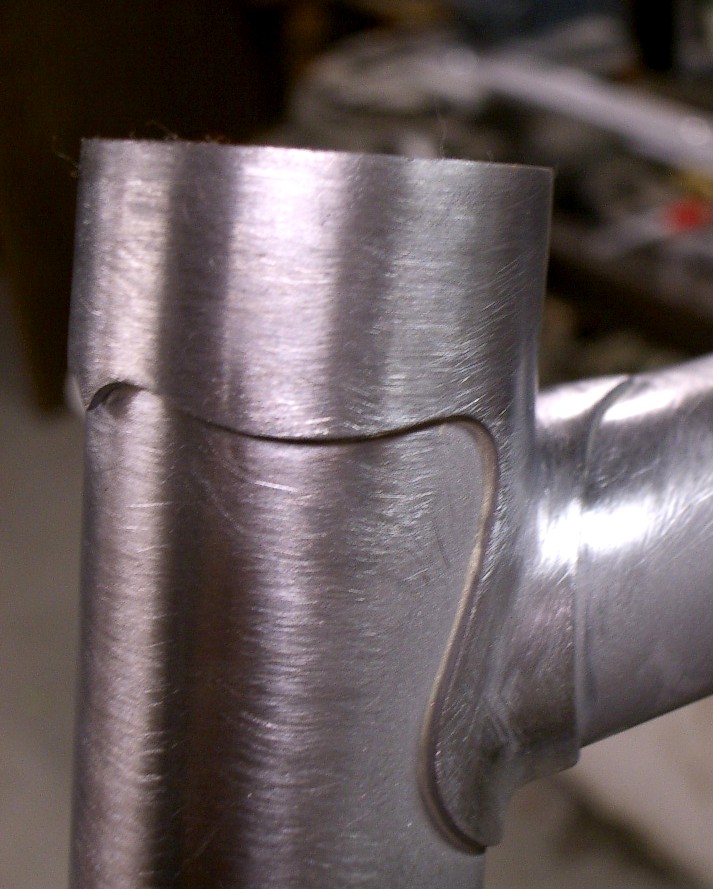
Here's how things are looking after some sanding on the lugs. Notice all the lug edges are very clean, no excess silver, no gaps. Nothing but nice clean sharp edges. That's what I was talking about at the start of this entry!
I sand them down to make sure all the surface irregularities from casting are removed and to make them smooth and flowing.
If everything is done right, this is how it should all look, just a fine tiny line of silver at the lug edge, crisp edges all around and no material removed (sanded off) from the tubing at the lug edge (undercutting).
I clean up all the other lugs in the exact same manner and move on to the rear triangle, starting with the chainstays.
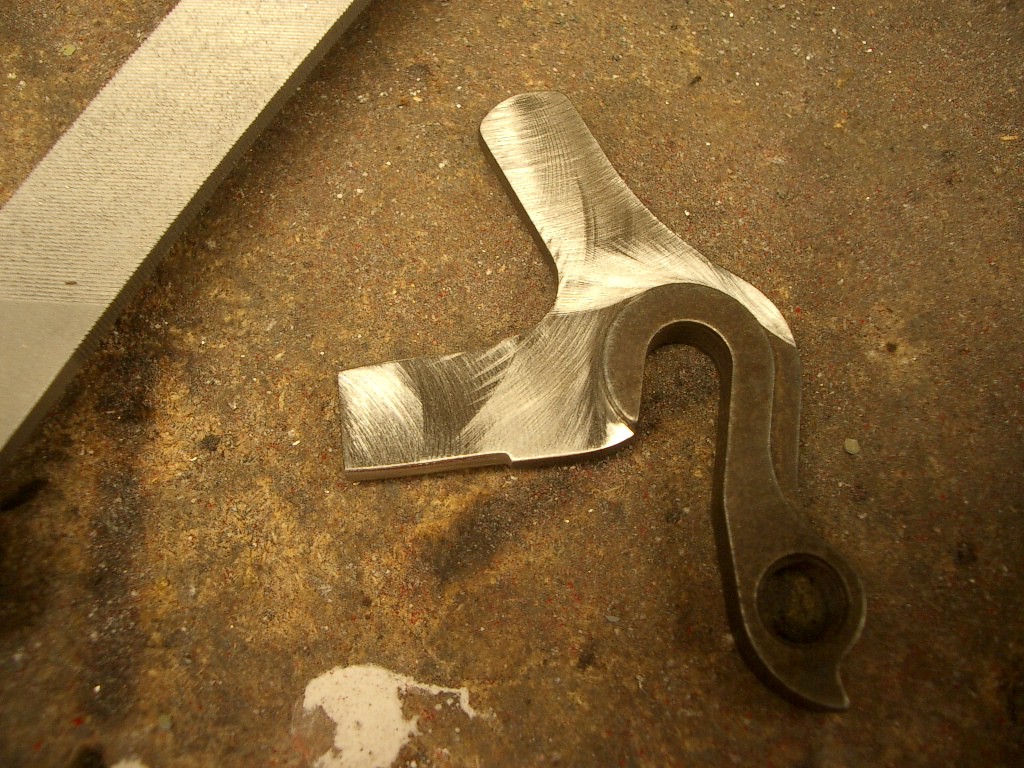
As I mentioned in an earlier post, Reynolds has their own 953 dropouts. They are very well made and match the tubing diameters perfectly. So in this case I decided to just round the top and bottom of the dropout tab slightly to make it fit inside the chainstay rather than slot the stays. Same look, but this is probably a slightly stronger construction method.
The dropouts are actually made of 953 material, so they're strong, very strong. But they still file pretty darn well, I'm amazed at this material.
 Again, I flux the heck out of everything and position the dropout correctly in the stay. One work of caution here. You really need to make sure the angle of the dropout and position are spot-on with the 953 dropouts. They're actually too strong to cold-set. I was unable to bend them at all without the aid of heat! I'd recommend a jig for installing them to make sure you have it right.
Again, since they're stainless, only silver filler will work. So I filled these with 50n silver, which is about the only thing that can fill a gap that big. Even at that, it's not the easiest braze.
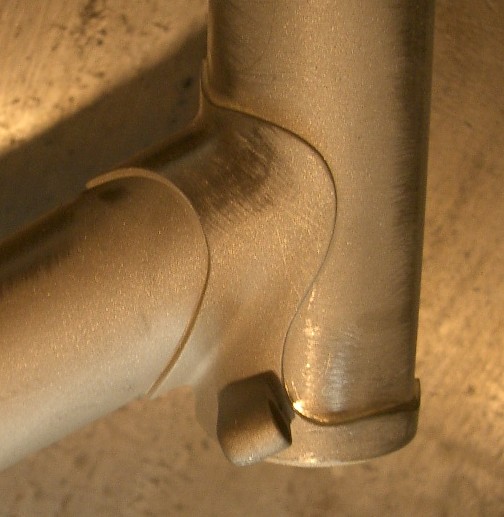
 Here's how it looks after brazing and soaking off the flux. Notice the natural fillet of the material, that's what you want since I'll be scalloping this area out in the next step.
The silver fills up the gap about all the way along the tab inside the dropout, so that chainstay is filled about 1-1.5cm back into it. With the current silver prices, that's probably $20 worth of filler in the dropouts!
 Next step is what I consider one of the highlights of any well made frame. Scalloping the dropouts. This is the traditional way to finish dropouts and it takes some skill to make it look really sharp. The key here is the scallops should be even, vertical and not undercut at all into the actual dropout. I also prefer the look shown here where the top and bottom of the dropout tab seamlessly blend into the stay. I think this is able as clean a look as possible. It makes me really dig the shape on these Reynolds dropouts.
But this means you need to plan ahead a little and be sure to fill in the inside of the drive side dropout with more silver, or start the fill further up the stay.
Again notice the dropout is angled in to make sure the axle camping face is perpendicular to the axle. My jig worked pretty well and things came out nearly spot on. Which is a good thing since I don't have much hope of cold-setting those dropouts now that they're brazed in. I guess one could use heat, but you risk melting out part of the braze if you're not careful. Better to do it right the first time!
Well, that's all I have time for right now. Look for the remainder of the build pictures to come soon.
bbbb
8 comments:
This is beautiful work - thank you for taking the trouble to document it so nicely. How long did it take you to go thro' the steps you documented?
Drool...
Bob, that is fantastic! I can't wait to see the complete frame!!
Frickin SWEET! Talk about a how to manual for 953!! Thanks Bob!
Dave Anderson
Fantastic work! Looks very clean. Do you ever do welds on stainless, or does the brazing always work out better?
Man, this entry really seems to have people talking. I've had quite a few emails.
I'll keep documenting this thru the fuly finished frame, just need to upload some more pictures.
There wasn't much info out there about 953, even less about lugs and 953 and I wanted to change that. It's a very feasible operation, but you need to take all the considerations of stainless into account. I do want to emphasize that this is a difficult material to braze correctly and cleanly. I don't recommend using it unless you have a lot of experience brazing stainless lugs already.
Also, to respond to Adam's comment, I don't do anhy welding on frames, I leave that to others. Everything I do is brazed and I want people to know they can have a really great lugged frame with 953!
Thanks for reading.
Bob
Bob, I'm not trying to blow sunshine up your ass....... but you're more then a framebuilder-that's pure artistry.
Hello, Bob. Very nice work indeed. I was wondering what filler you were using for the seatlug-seastay attachment and for the dropouts? Seems like 56% might be to liquid and way too expensive. Cheers, Paul@ Rock Lobster.
Post a Comment