I've delivered almost all the repaints that I had in the shop, which cleared out a nice bit of room. Felt really good to finally get this Ritchey frame back to the Vitch since it had been sitting in my shop since before Kenwood closed up. He's a patient guy, but really I don't like having any projects in my shop that long.
Of course the downside is that as soon as I got rid of 4 repaints, I got two more in. Guess that's business, there's always work waiting.
I'm almost done with another frame build as well. The customer will be providing me with a few critical components for the frame so that I can wrap up the final fit of the chainguard (yes I'm making a chainguard from scratch for this one). I know he's probably anxious to get the final product so I'm eager to get that frame finished up too.
 The really big news is that the copper plated nature bike is heading to it's final destination, the lucky lady out east who still hasn't seen any hint of what it looks like. This one has been a long time in the works, but I really hope she feels the final result was worth the wait.
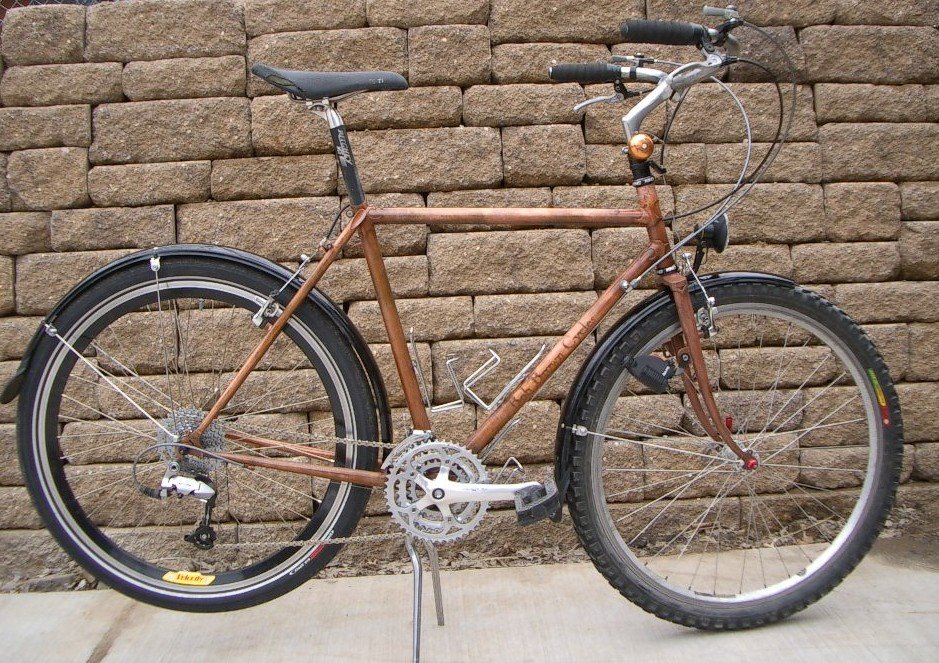
Here's a shot of the whole bike. Now I didn't have all of the actual parts for the build, those last few items will go on when she get's it. So the front wheel, seatpost and saddle are not correct, but I needed something for the photo's. It'll look much better with matching wheels, and a brooks saddle!

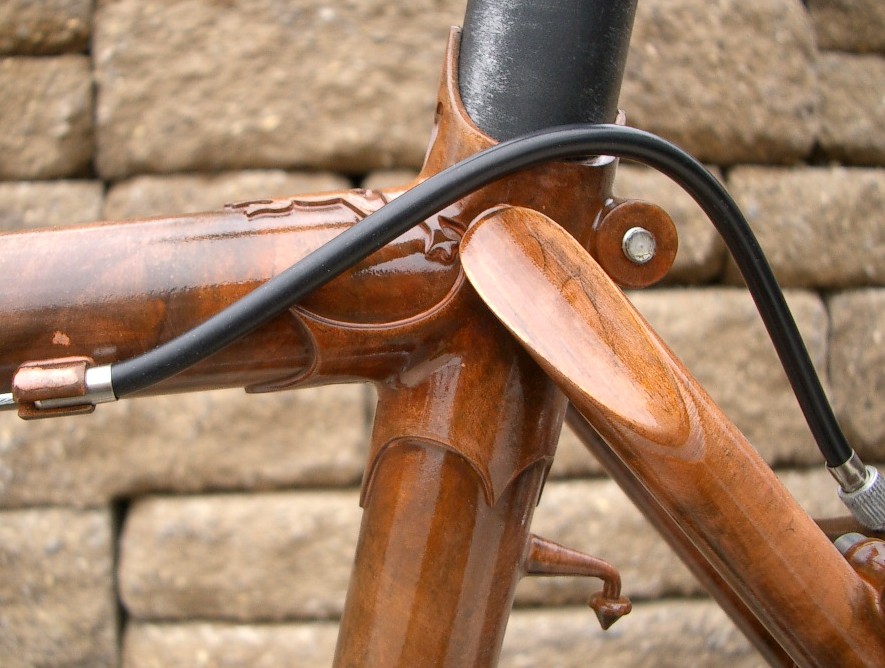
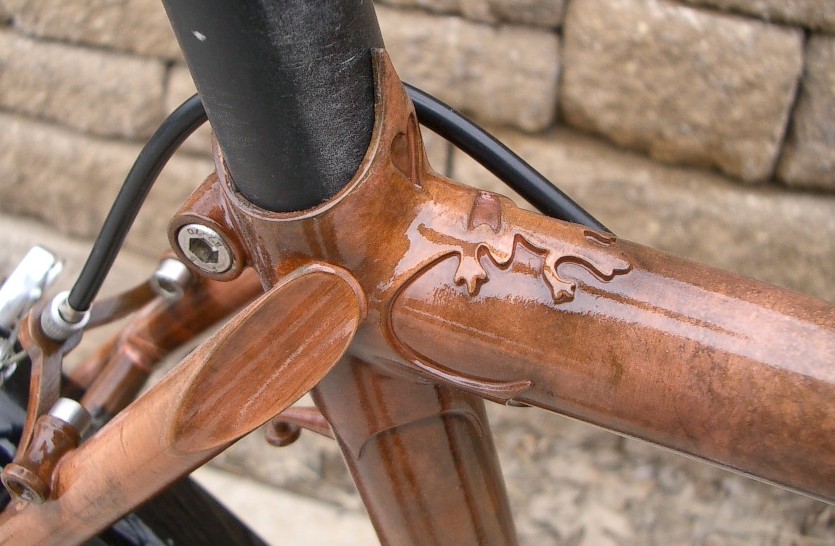
Really the beauty of this bike is in the details. The copper finish really lets them all shine through as it shows all the brazing and filler.
I really love the seat-cluster and how that whole area came out.
Below is a shot of the BB area and the kickstand plate. I'm not a big fan of kickstands for most bikes, but this is a full-on touring bike and those double leg kickstands are pretty sweet for holding the bike up while you dig through your panniers.

Getting my logo on the downtube was one of those things that I really put a lot of thought into. After seeing how cool and antique the copper was looking I wanted to make sure the logo fit in, a regular modern decal just wasn't going to cut it.
So I applied mask of my logo to the tube, then used a chemical etch to darken the steel in the shape of my logo. After that I was able to apply the copper right over and get this cool antique look. I just love how textured the copper came out and the light and dark areas around the lettering. In many areas the finish look more like weathered leather of mahogany than metal.
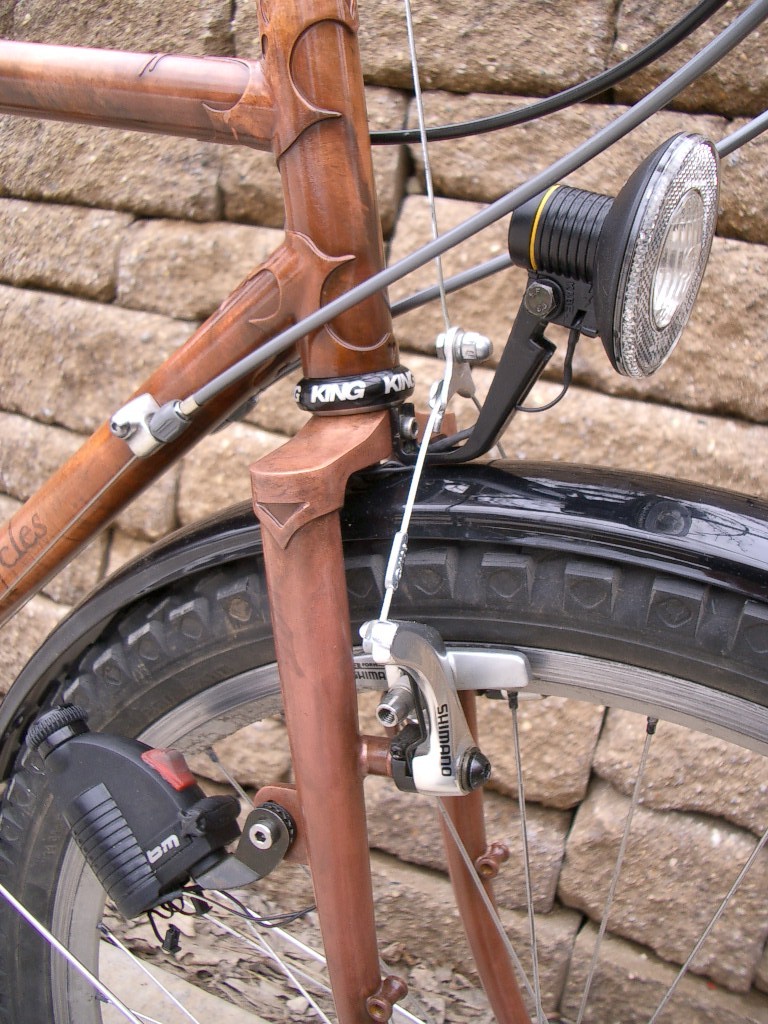
As I said earlier, this is a fully loaded touring bike. Lights were definitely a requirement. In this case, the fork is designed to take a B & M dynamo and headlight. It's actually set-up to take either a right of left hand dynamo for maximum flexibility, and there are about 5 ways the lamp could be mounted to accommodate many rack configurations. Again, I love the way the copper naturally darkens around the lug edges, highlighting all the carving that went into this bike.

The dropouts are pretty standard BBC issue, but it's worth a few pictures of how the brass filler shows through the plating. Initially I was concerned that this would look bad, but in the end, I think it only adds to the overall appeal of this finish. The color around the eyelet is actually a small amount of copper oxidation that occurred prior to clear coating. I expect the copper will oxidize slightly even under the clear, but it will be a slow process and should only add to the charm.
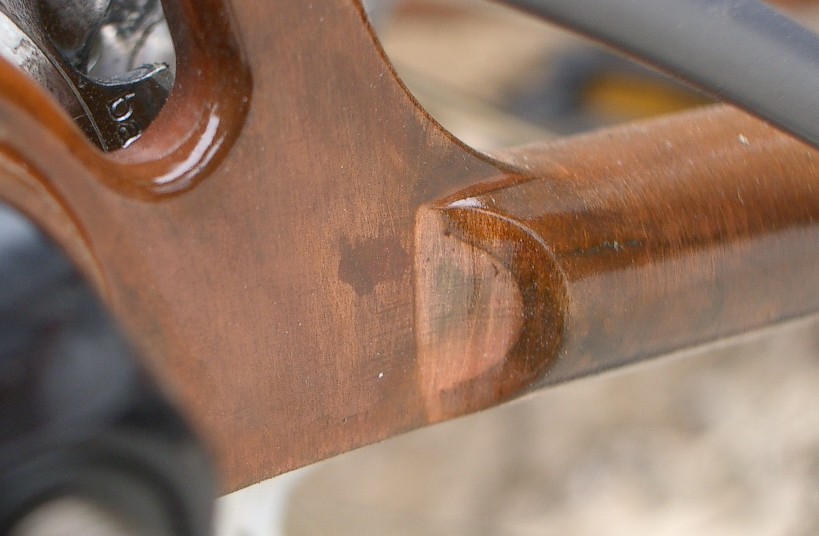
One thing I will say is that this is not a finish to be applied to sloppy brazing. As you can see, everything shows. Here is a shot of the driveside dropout. Filler has to be only where it's supposed to be or you'll see it. If you click on the photo to enlarge it, this pictures shows the texture of the copper quite well.
In other news, I'm still hacking and coughing constantly. This thing just won't shake loose, but I know several other folks with similar problems and it sounds like the cough hangs on for about 3 weeks. yuk. I still managed to get in a couple of rides this weekend despite hacking the whole way. Did some hills with the kenwood boys Saturday, during which time I discovered that I still felt pretty weak from being sick. Then went out Sunday on what should have been an easy ride, but due to my tired legs and a stiff headwind I really felt the hurt.
That ride pretty well took the wind out of my sails the rest of Sunday, so I layed low and tuned up an old commuting bike for a friend and then installed a couple sections of trim upstairs in the new room. That was about all I had the energy for.
Talk at you later,
bbbb